Sandbags
Tutorial
Required skills
in photoshop 9: Open, save document. Create, change order of and
rename new layer. Select and use different painting tools. Change
brush type and size. Create and edit paths.
Steps:
1)
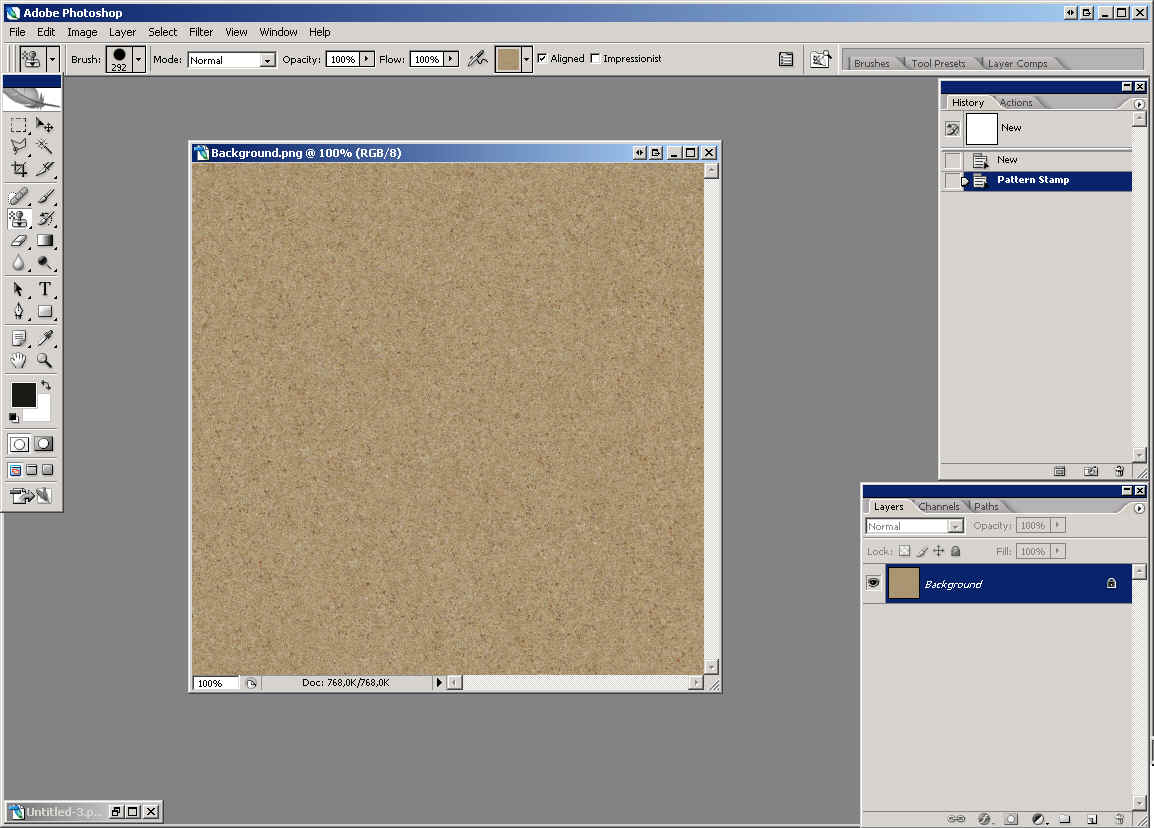
I'm going to use Background.png (included in zip) as background
picture in this tutorial.
2) Open image
dodamsandbags1.png (or dodamsandbags2.png or dodamsandbags3.png)
included in zip. Edit -> Define Pattern -> Enter. You
can change saturation and color of texture before you make pattern.
(ctrl+u or ctrl+b)

3) Open dodamsandbagsbrush.psd
(included in zip). Edit -> Define Brush Preset...-> Enter
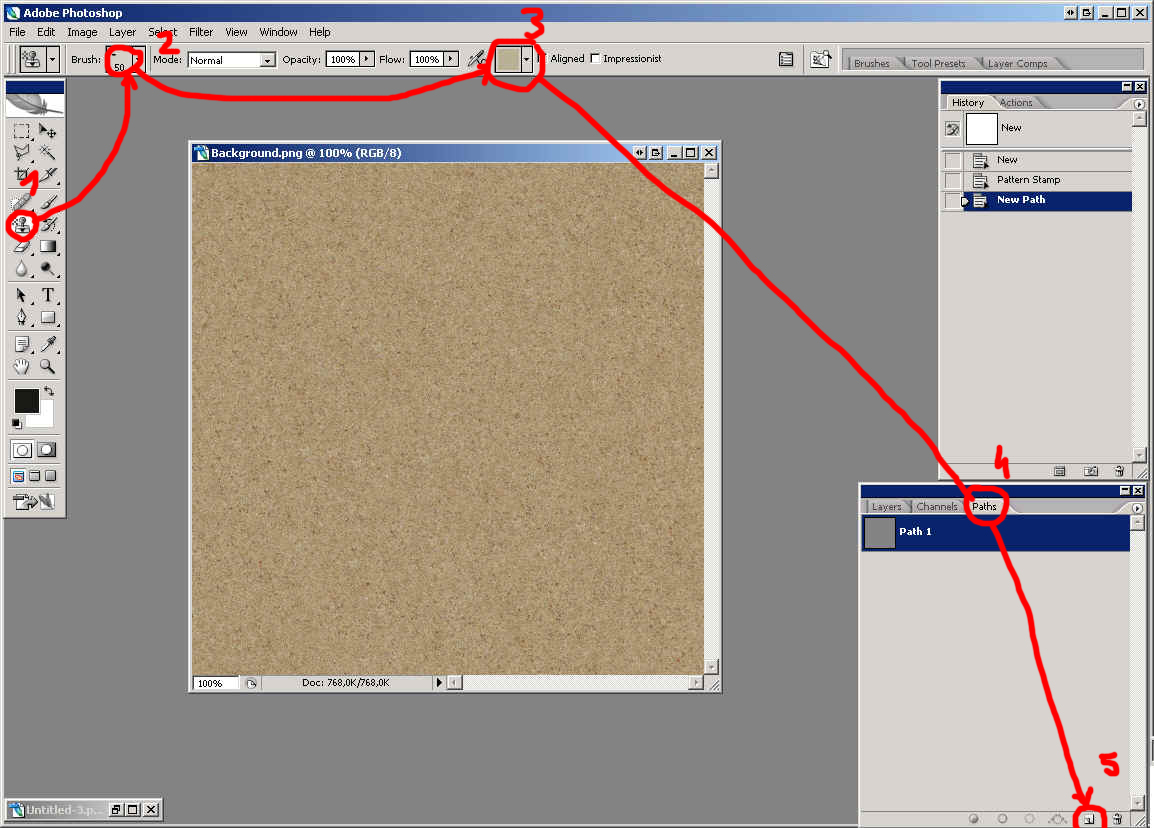
Click on Pattern
stamp tool (1), select dodamsandbagsbrush.psd, set it to 50 pix
(2) and select dodamsandbags1.png pattern (3) . (This pattern
should be on the end of the list.)
Click on Paths
tab (4) and create new path (5).
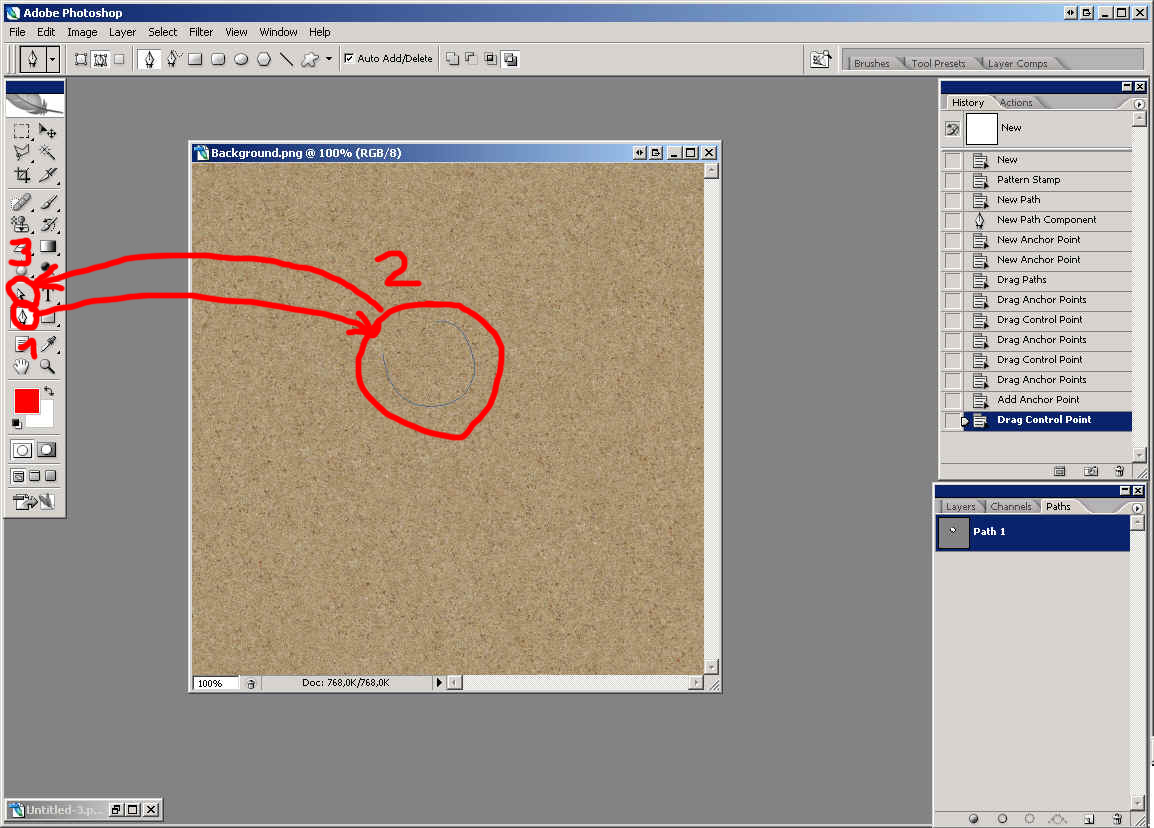
4) Select Pen
tool (1) draw path (2)
- To reshape
a path component
Select the path name in the Paths palette, and use the Direct Selection
tool (3) to select an anchor point in the path.
Drag the point or its handles to a new location.
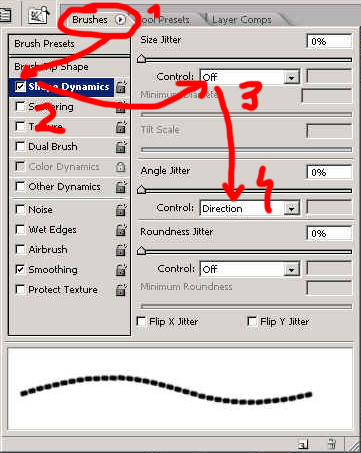
5) Select Pattern
stamp tool, click on Brushes tab and set Shape Dynamics like in
the picture below:
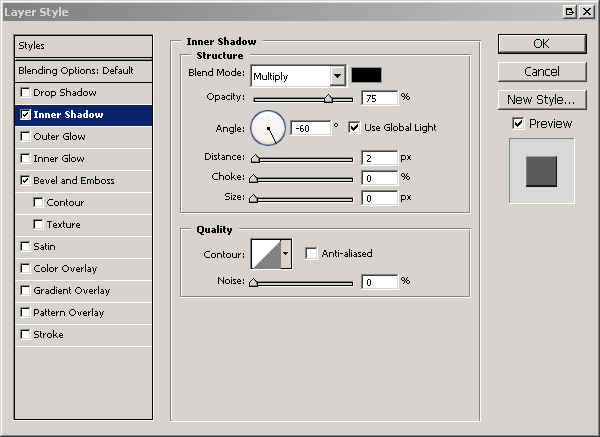
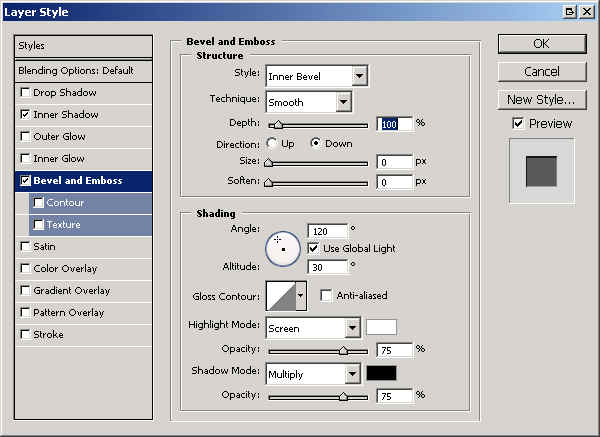
6) Create new
layer, name it Sandbags 1, double click on it and set option
for Inner Shadow and Bevel and Emboss like in the pictures below:
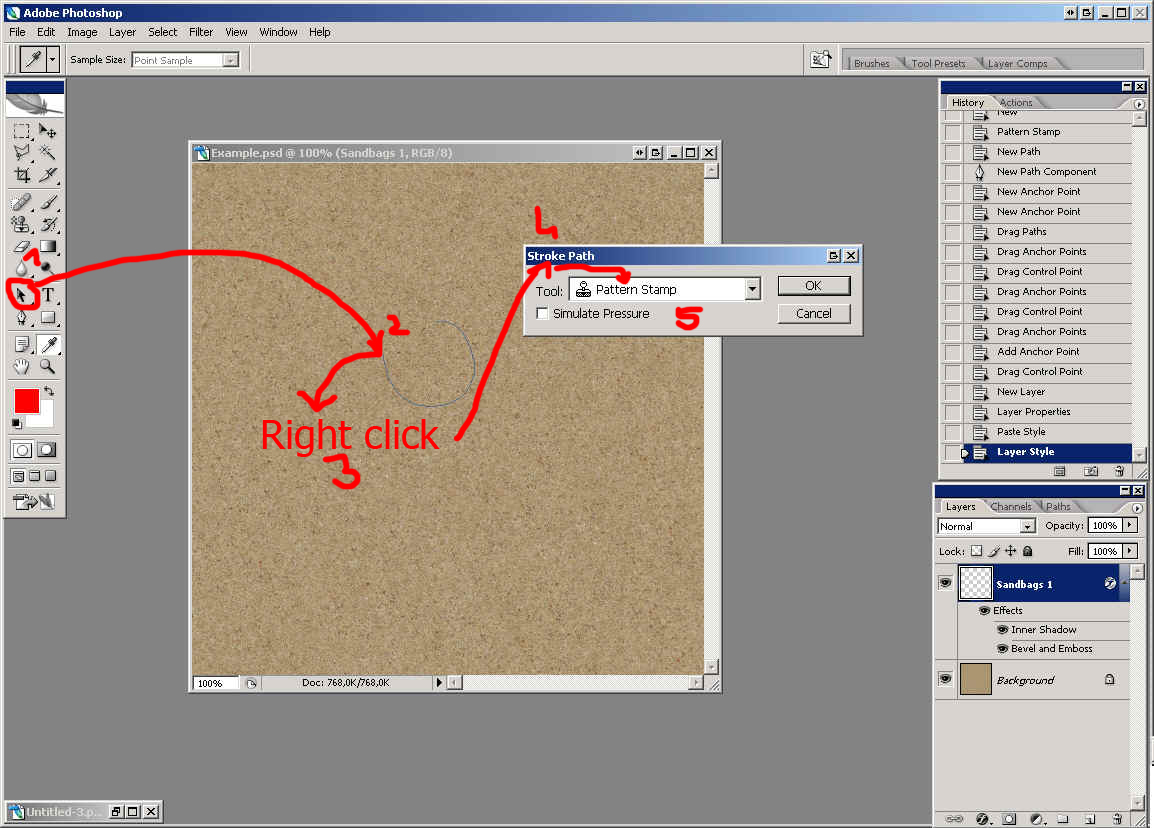
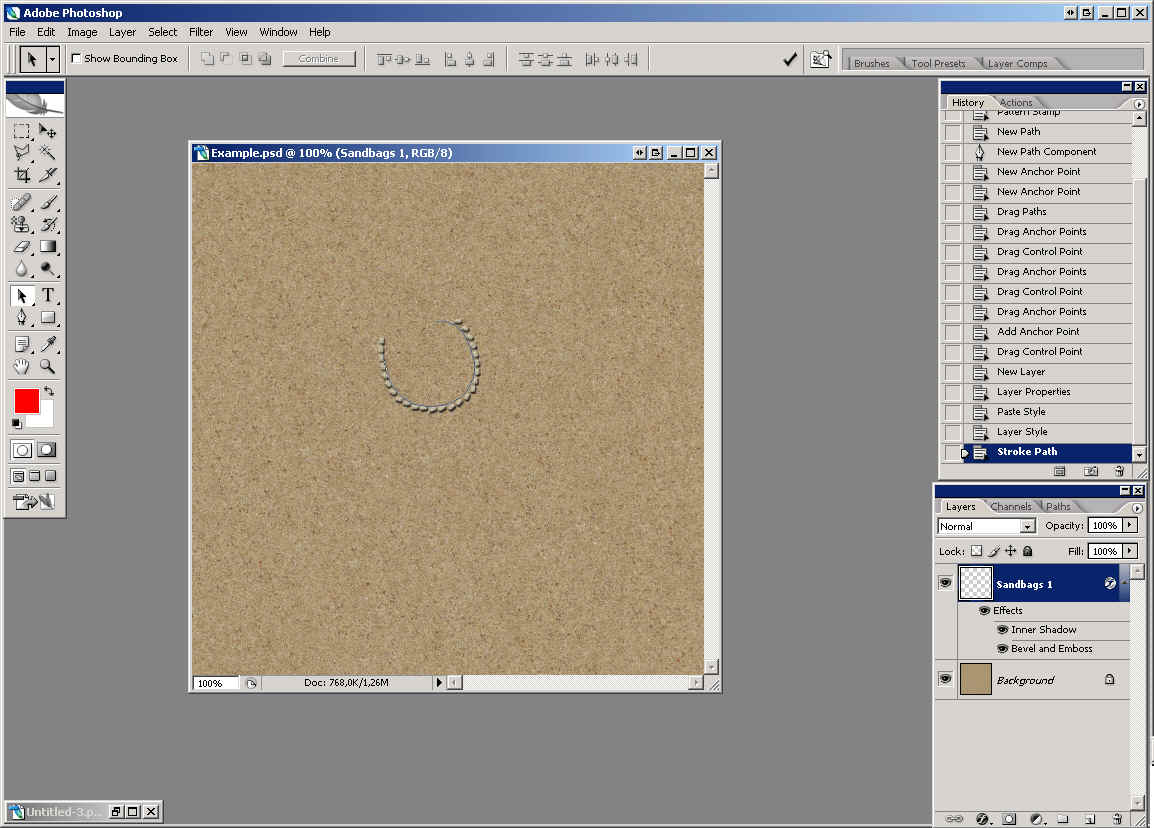
7) Select Path
Selection Tool (1) (press A) and click on path(2). Right click on
picture (3)-> Stroke path (4)->Select Pattern stamp (5)->
OK.
8) It should
be like in the picture below:
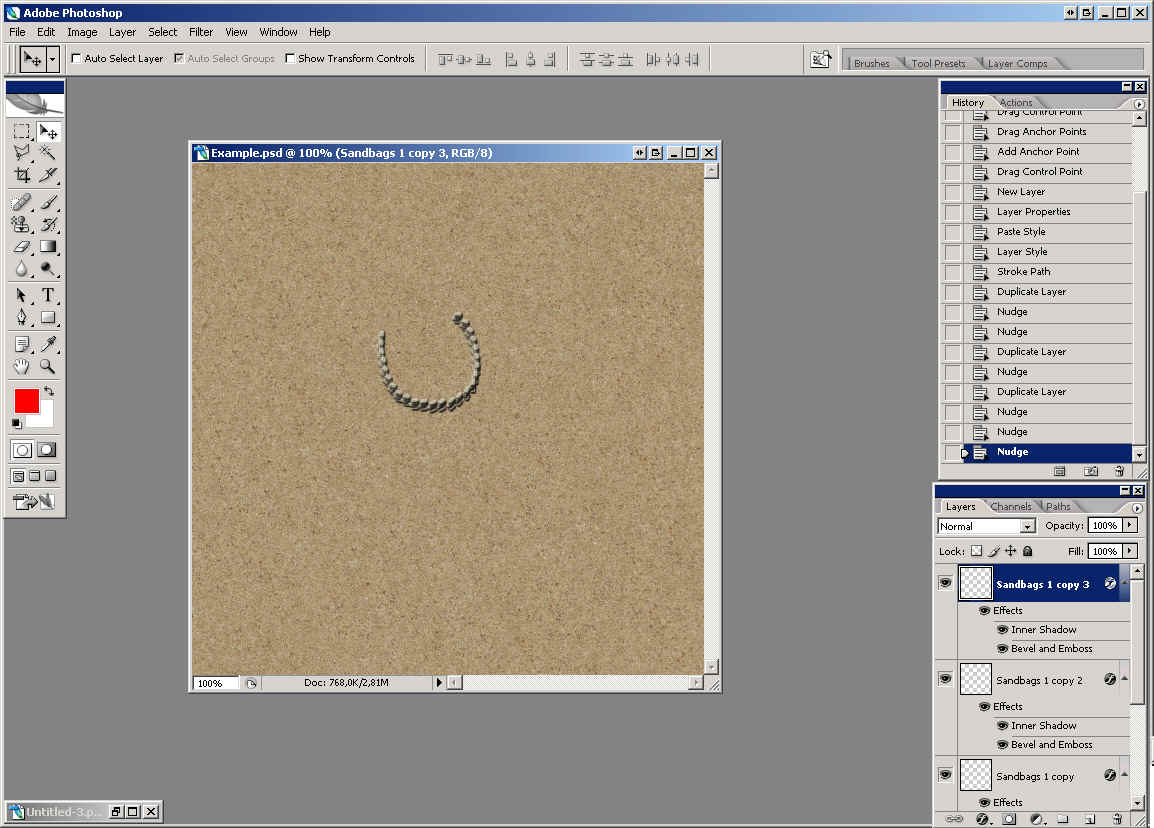
9) From now
you can go in two ways
a) Duplicate
layer Sandbags 1 and move it slightly up or up+left or
right using Move tool. Duplicate it again and move it even more
up than the first copy. If you continue to duplicate layer Sandbags
1 you will get higher sandbags wall. You can use cursors keys
to move layer precisely.
b) Slightly
change path, move it up a bit and stroke path with Pattern Stamp
Tool again on new layer with same layer style as Sandbags 1.
Repeat few times. This metod is better but slower.
I'll do first
way and duplicate layer Sandbags 1 three times: (right
click on layer and select Duplicate Layer)
You can go to
Paths tab and click below Path 1 to unselect path.
10) Create new
layer (1) just above Background layer and name it Shadow
(2). Select Brush tool (3) and round soft brush about 10-15z in
size black paint color (4) and paint shadow on the right place (5)
. Change opacity for Shadow layer to 75% or so (6) .
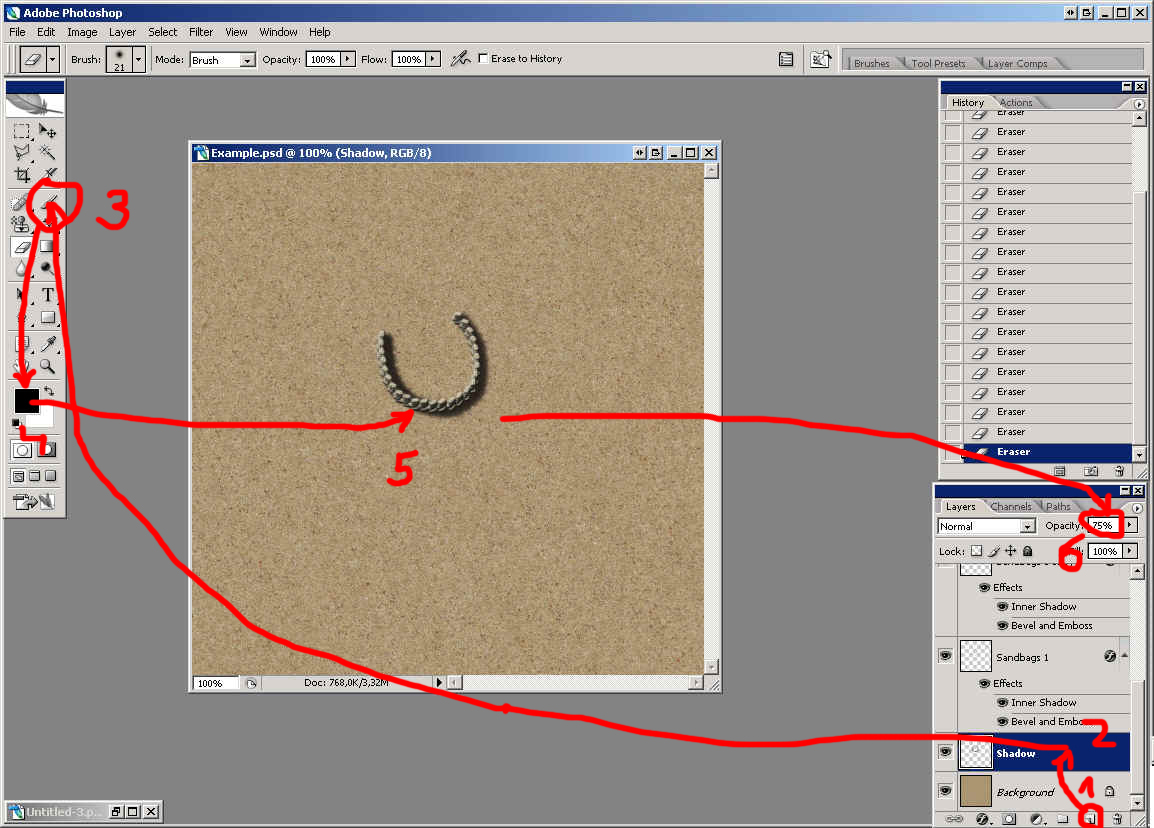
That's it. You
can do all kinds of shapes but now and then few sandbags "slip
away". Just cut one that did that and move it to right place.
It's obvious
that some things in this tutorial can be found in Neils (CSO_Linebacker)
tracks tutorial.
Thanks to Neil,
http://www.close-combat-now.com
for giving me that knowledge.
You may also
notice a resemblance with "Fast wehicle tracks tutorial".
Thanks to CSO
http://www.closecombat.org
for hosting this tutorial.
by dodam, heinrici45@yahoo.com
Top