Small
Craters Tutorials
Required
skills: Open, Close and Save document in Photoshop.
First,
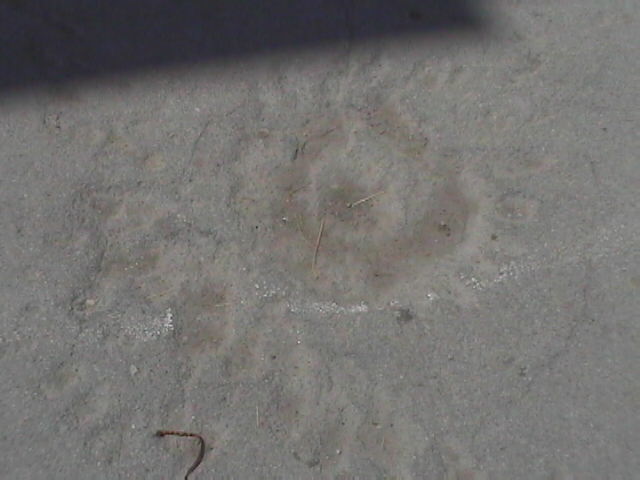
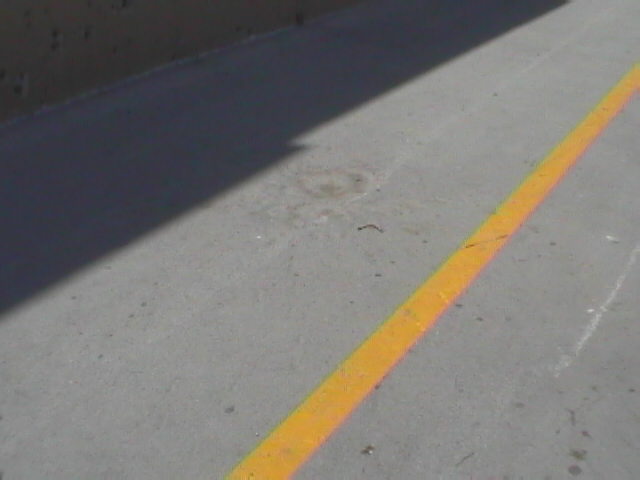
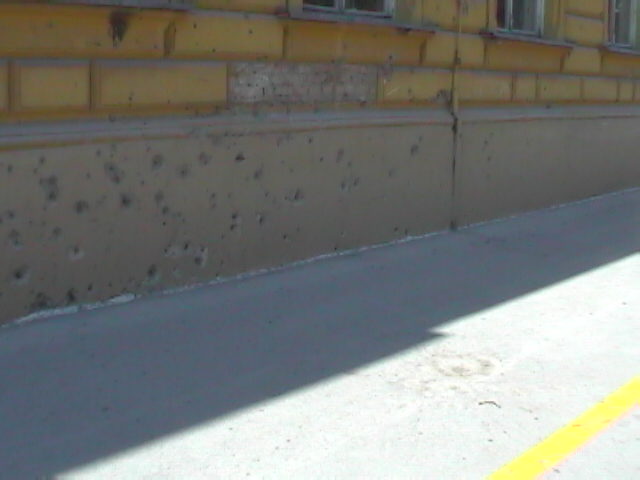
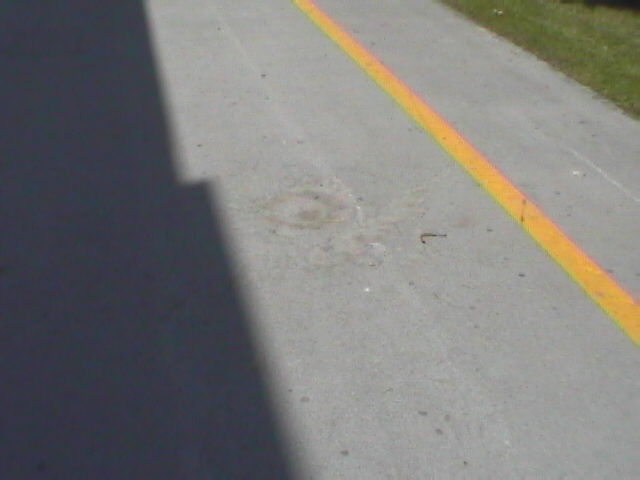
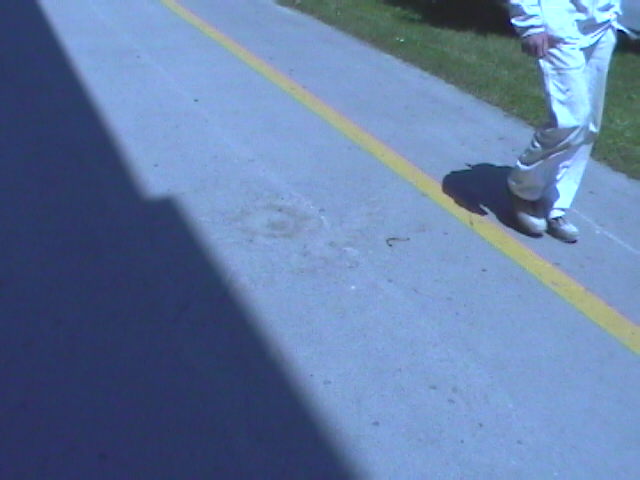
I have to say that mortar craters in Close Combat games look wrong.
When mortar shell hits the ground, the crater it makes doesn't look
like in the game.
I
know cause I see many mortar craters every day on the streets.
See photos.
(When mortar shell hits earth or grass it creates similar crater.)
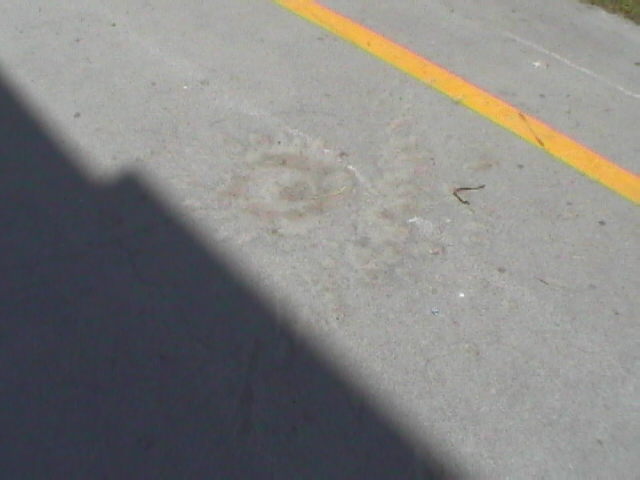
It takes very heavy or very fast projectil to create meteor like
crater. Such high speed/heavy projectiles penetrate ground and explode
deep, lifting a lot of earth in the air. Mortar shell explodes close
to surface (on the surface, if hits asphalt, concrete or similar
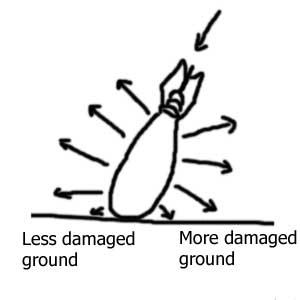
hard surface) creating "star" shaped crater. Most frequently
this star shaped craters are missing couple of arms and look like
this:
This
is because mortar shell hits the ground in an angle different from
90 degrees.
This
is tutorial about how to make more realistic mortar shell craters:
Steps:
1) Open your map image in Photoshop
I'll
use this small image CC5Grass up and asphalt down.
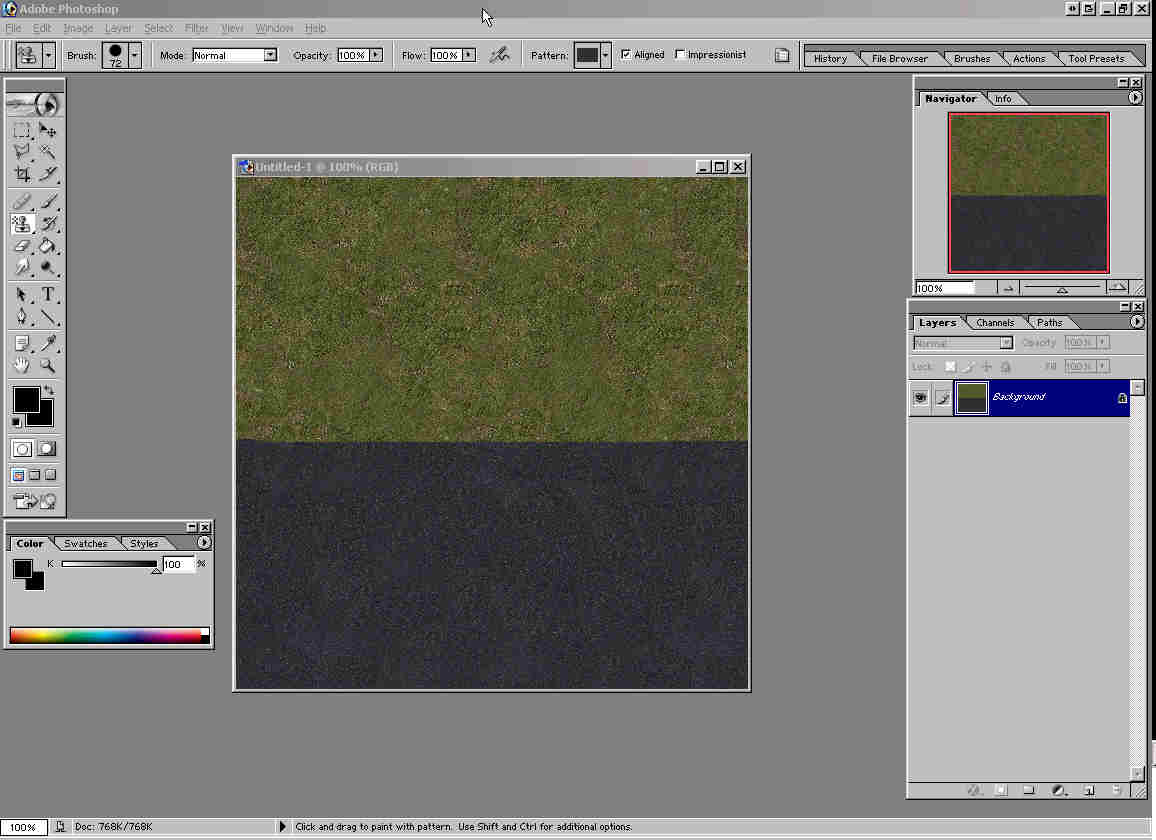
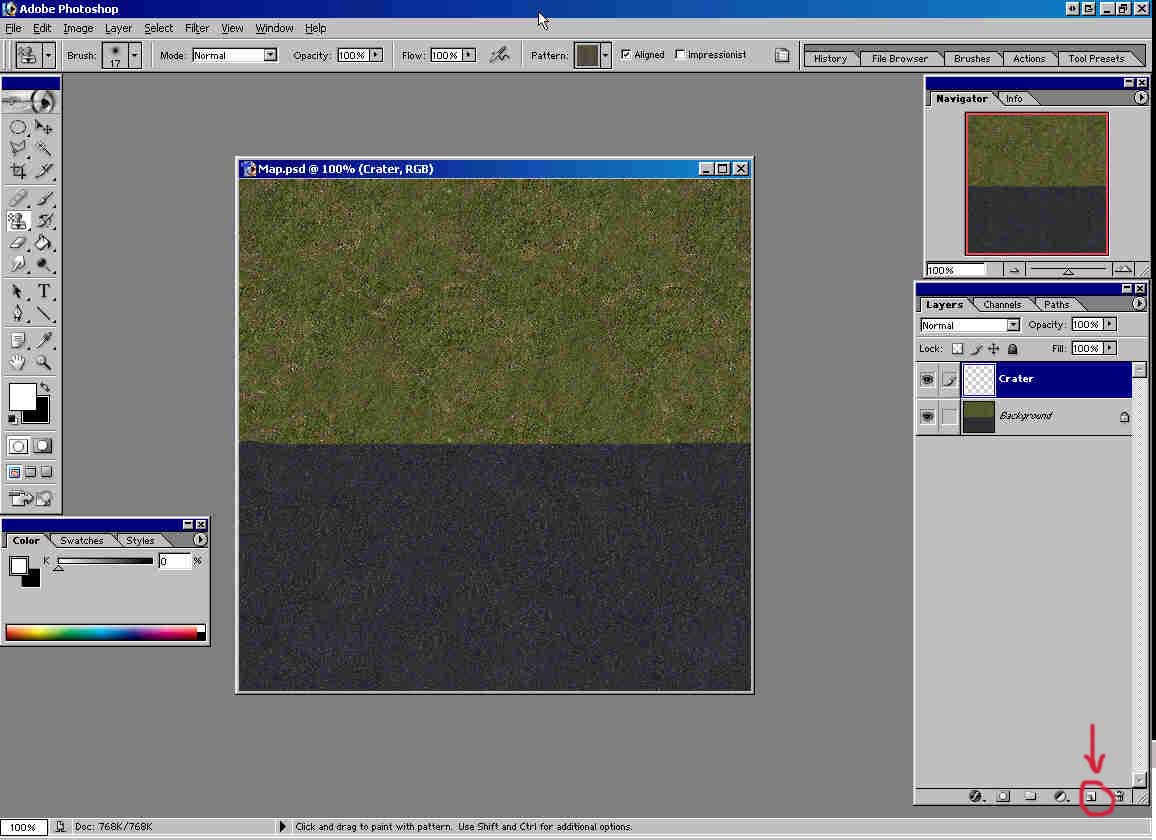
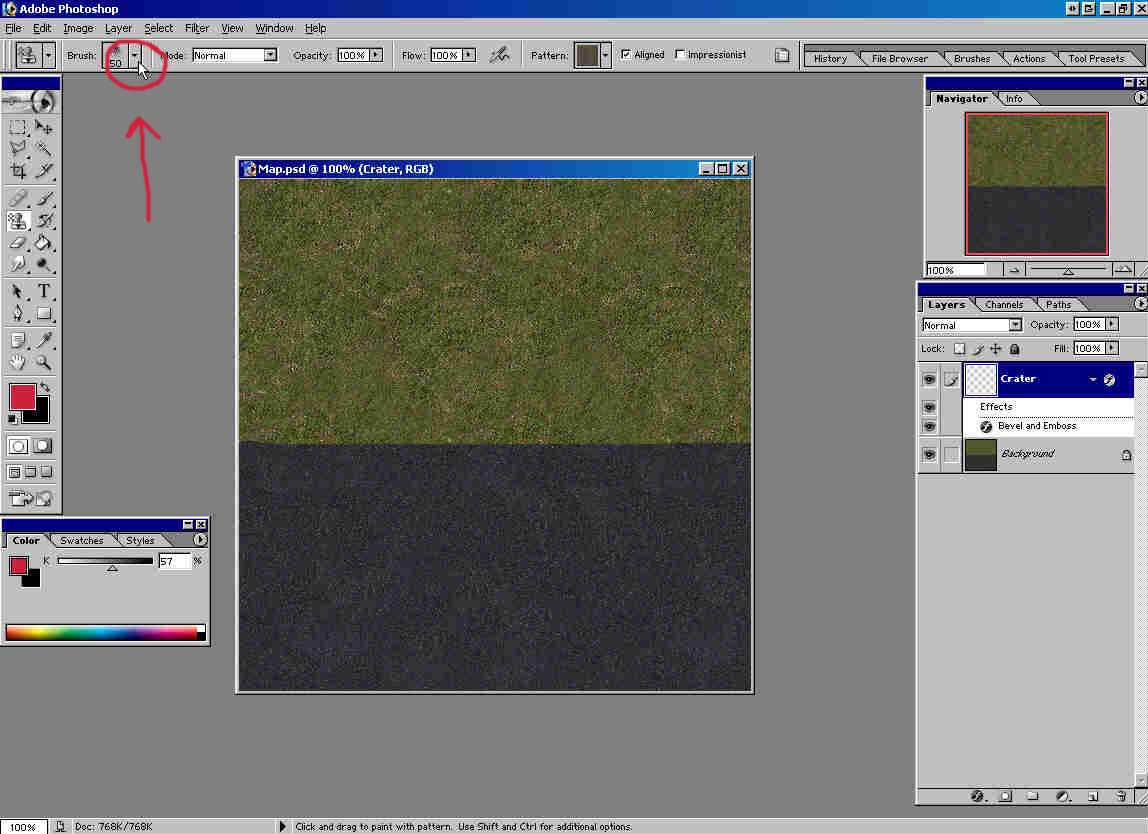
2)
Create new layer (see picture where to click) and name it Crater
(double click on Layer 1 -> type new name).
2) Open image Brush Mortar 1 (or Brush Mortar 2): File -> Open
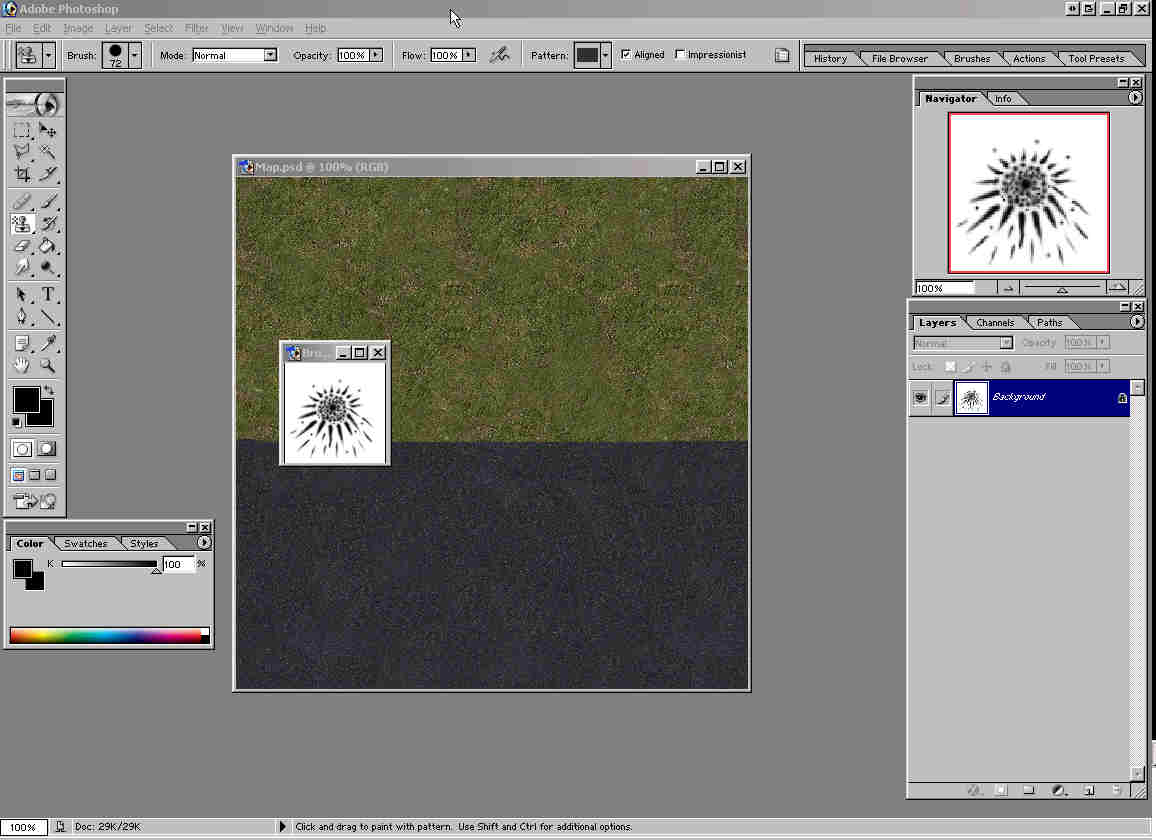
3) Edit -> Define Brush
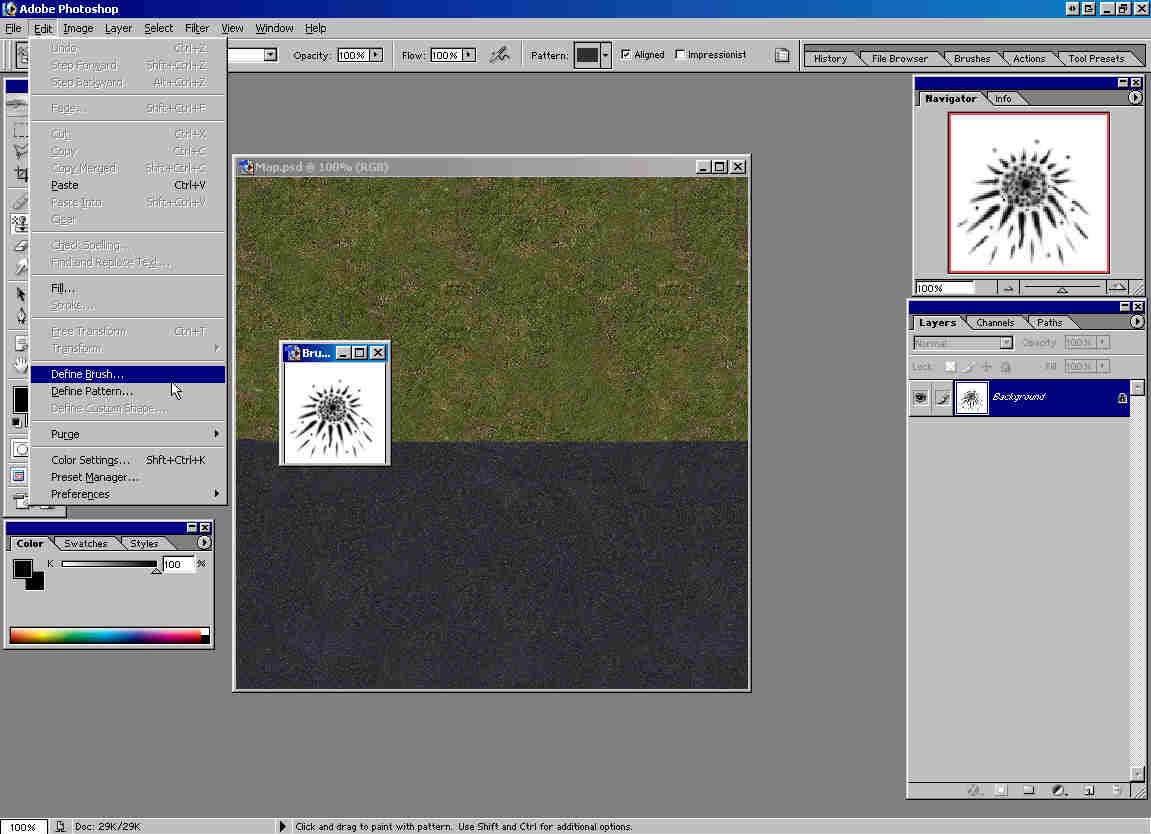
Now,
you should have brush like this:
4) Close Brush Mortar 1 image.
5)
Open image 1.psd. Purpose of this picture is to ease this tutorial,
reducing a lot of steps.
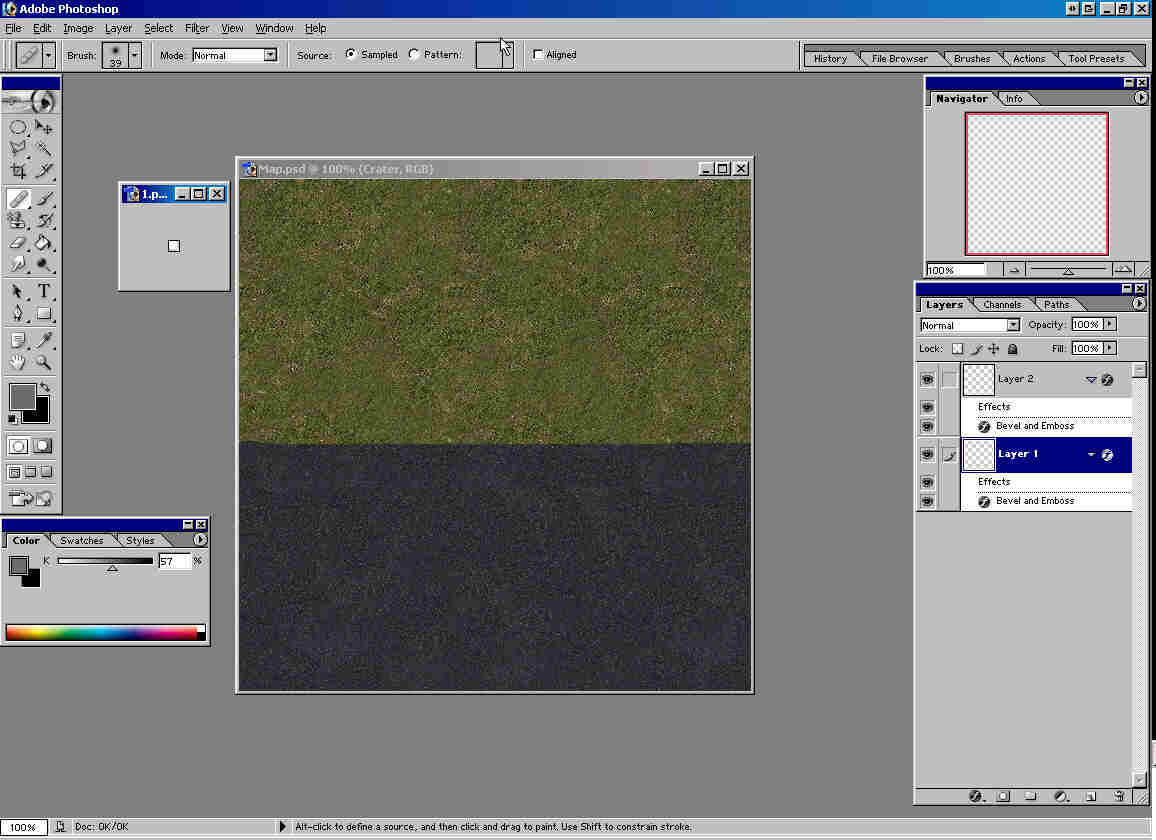
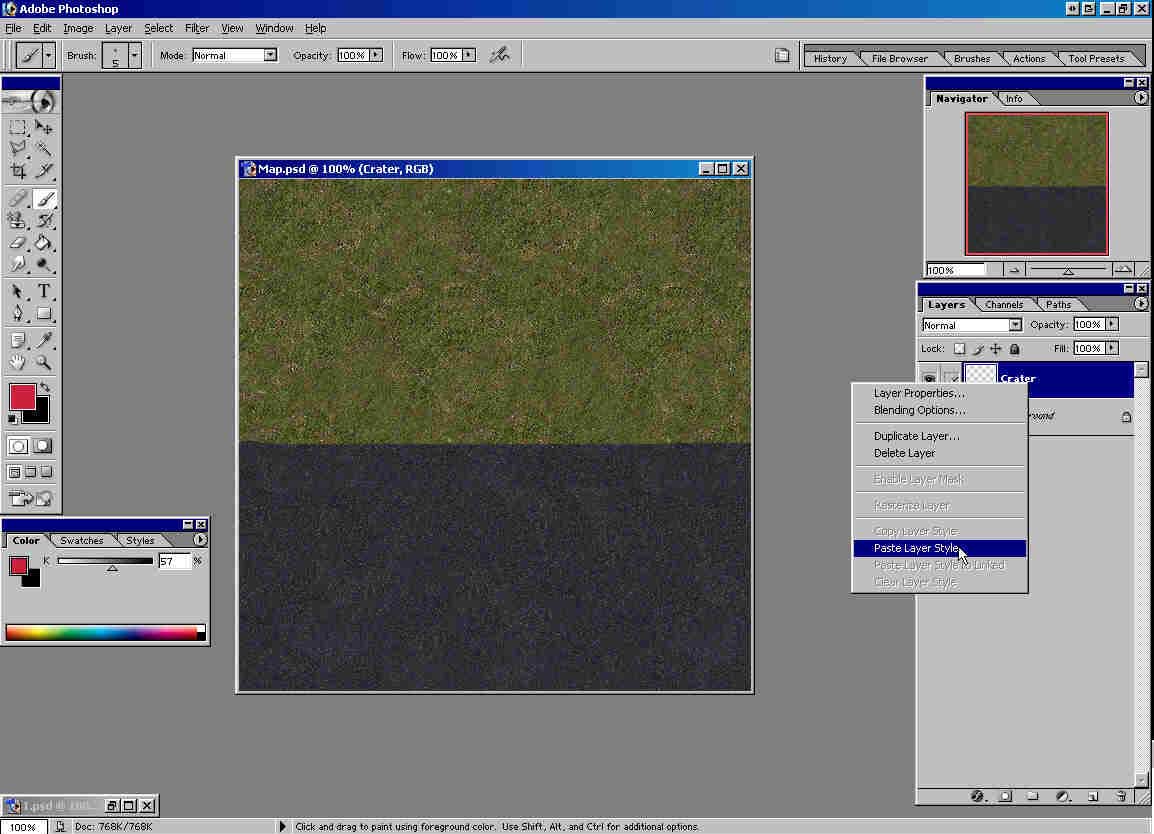
6 ) Right click on Layer 1 -> Copy Layer Style
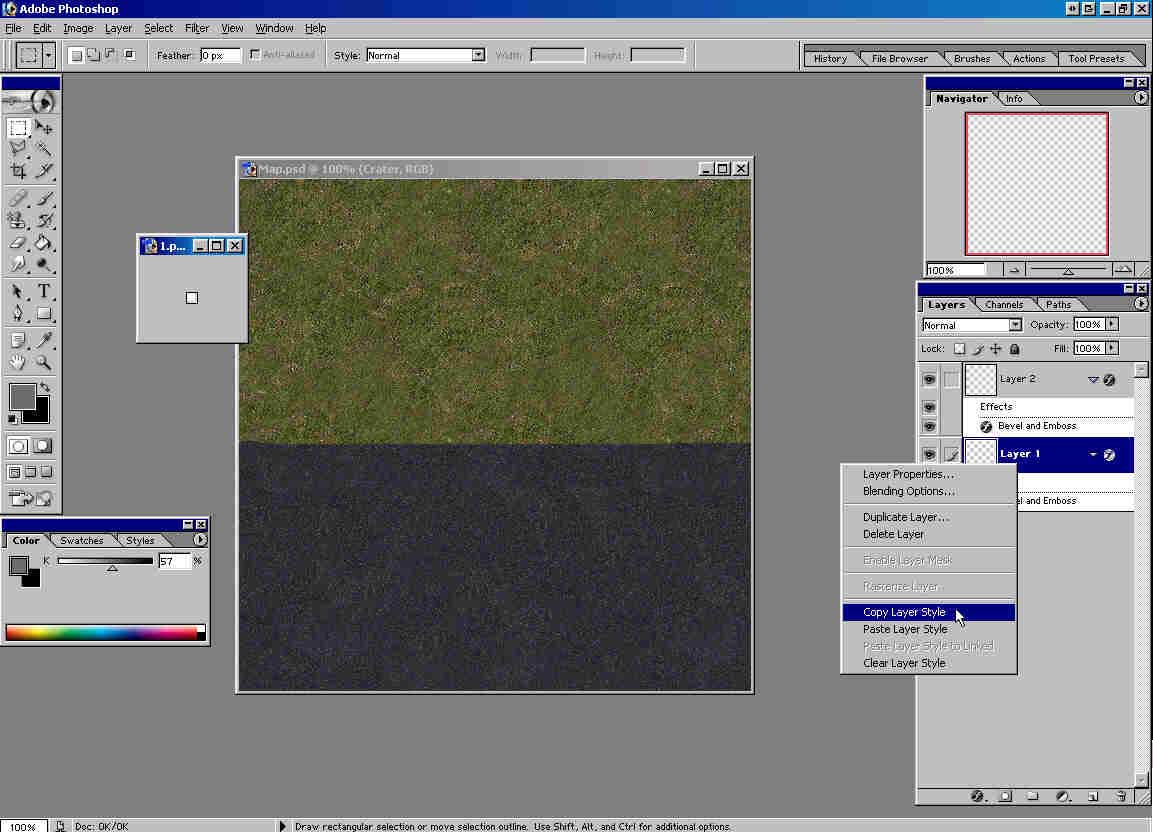
7 ) Minimize 1.psd
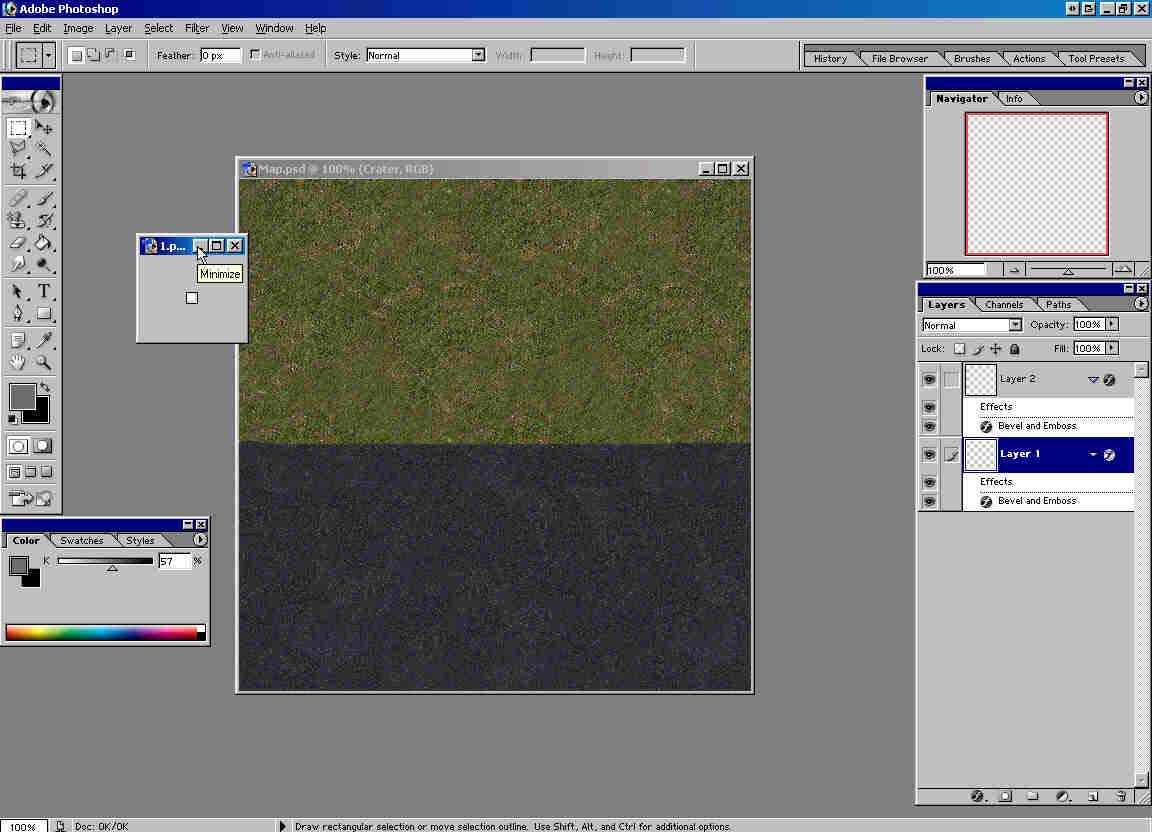
8 ) Right click on layer Craters -> Paste Layer Style
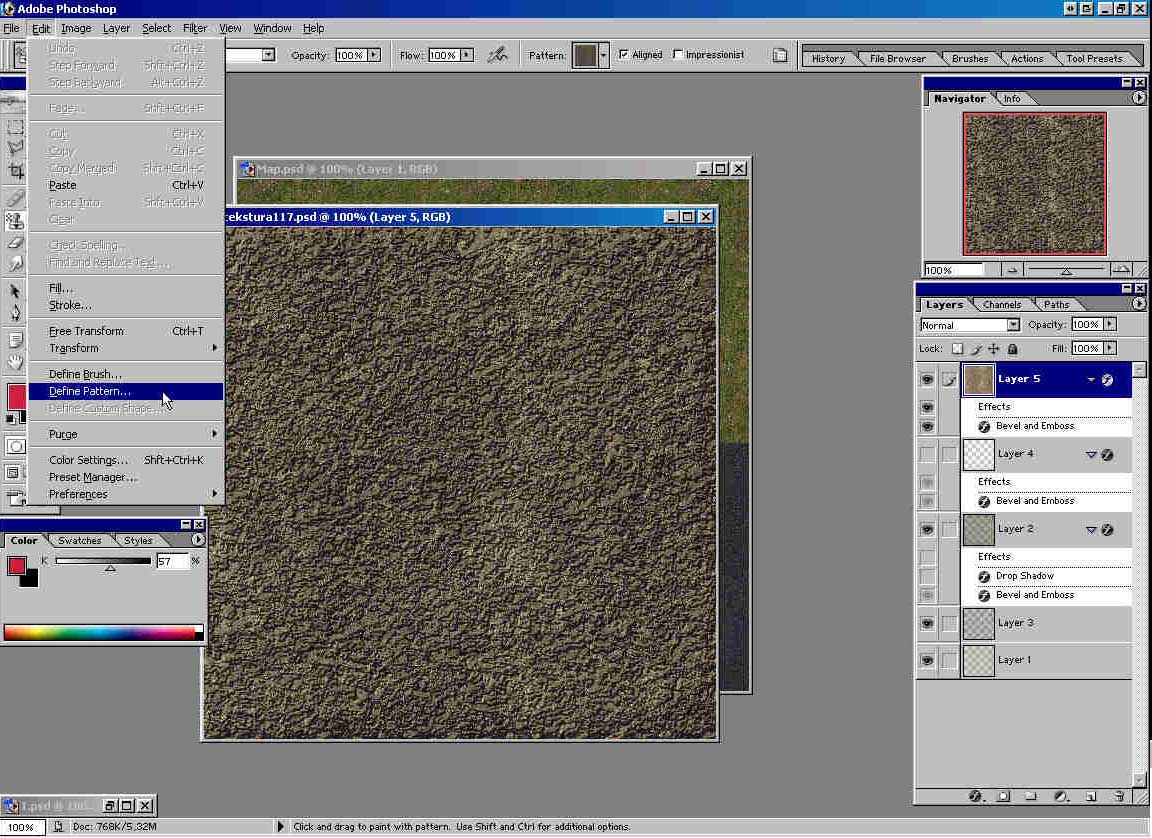
9 ) Open image Tekstura117.psd. Edit -> Define Pattern ->
name it Ground. (You wont have 5 layers as in the picture below,
just one)
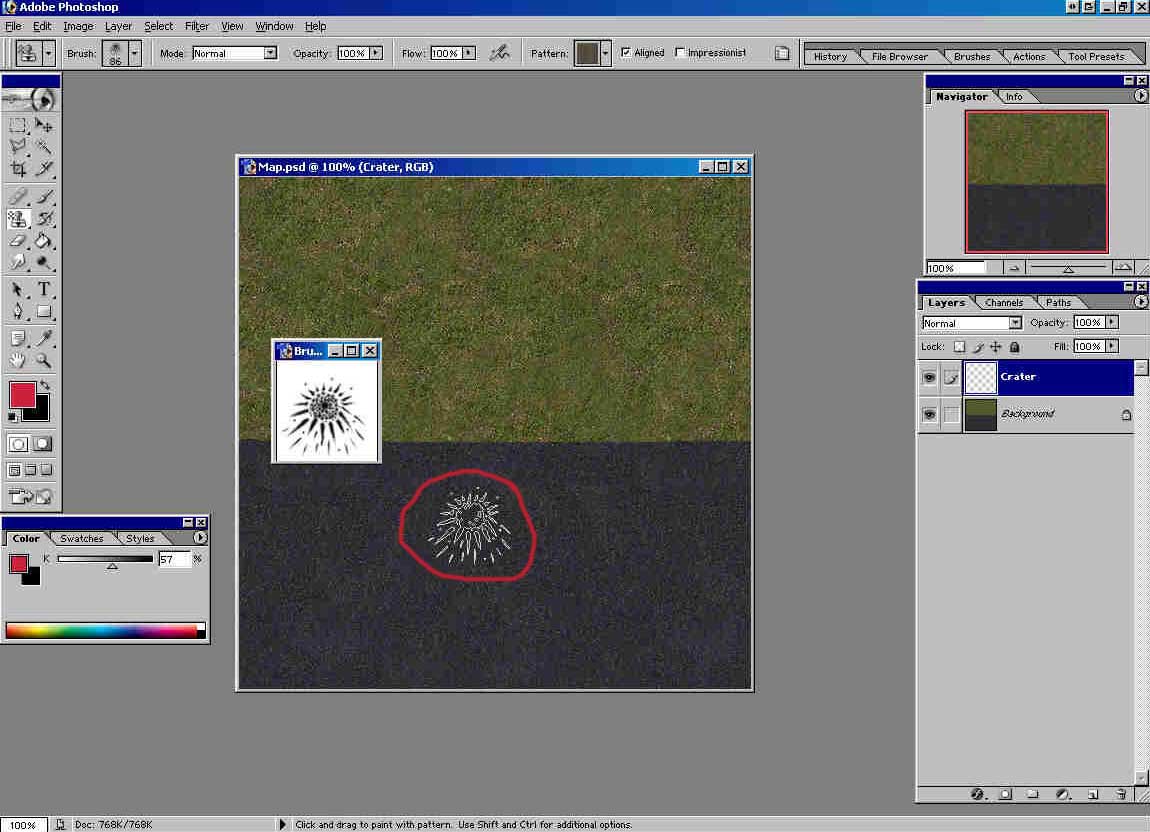
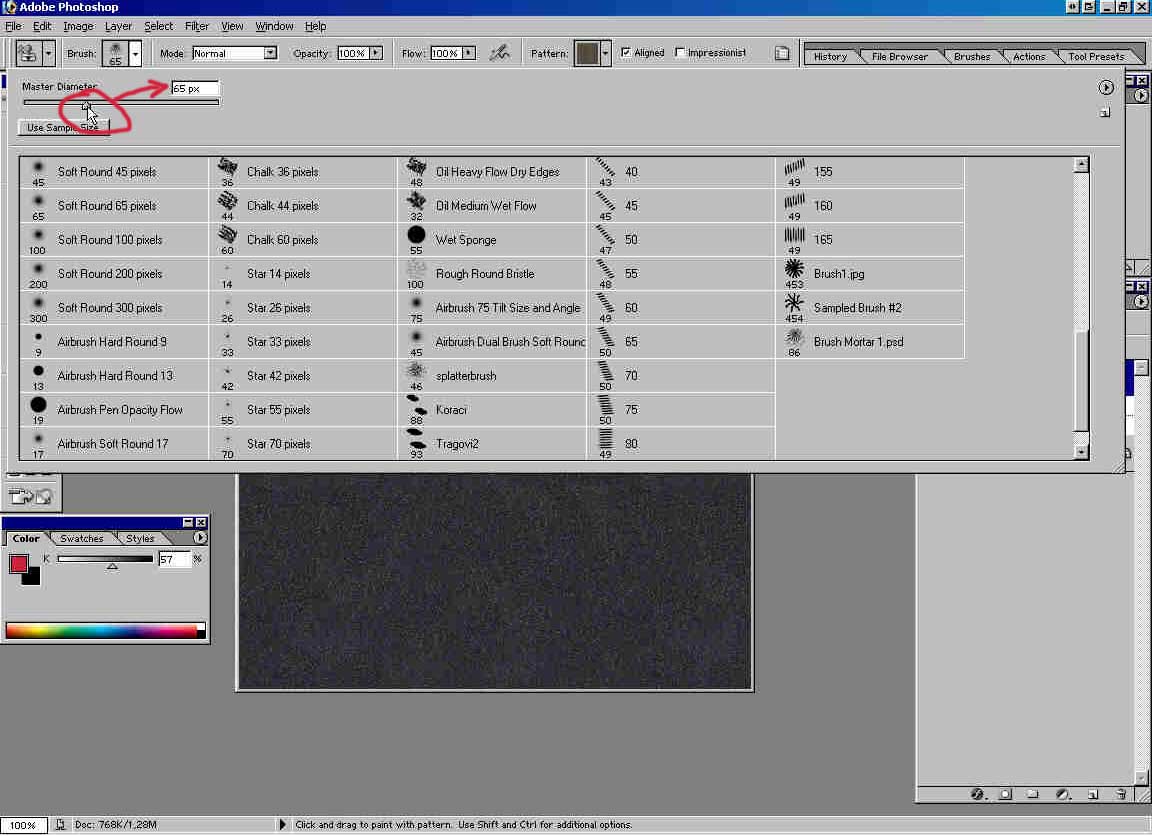
10)
Select Pattern Stamp Tool.
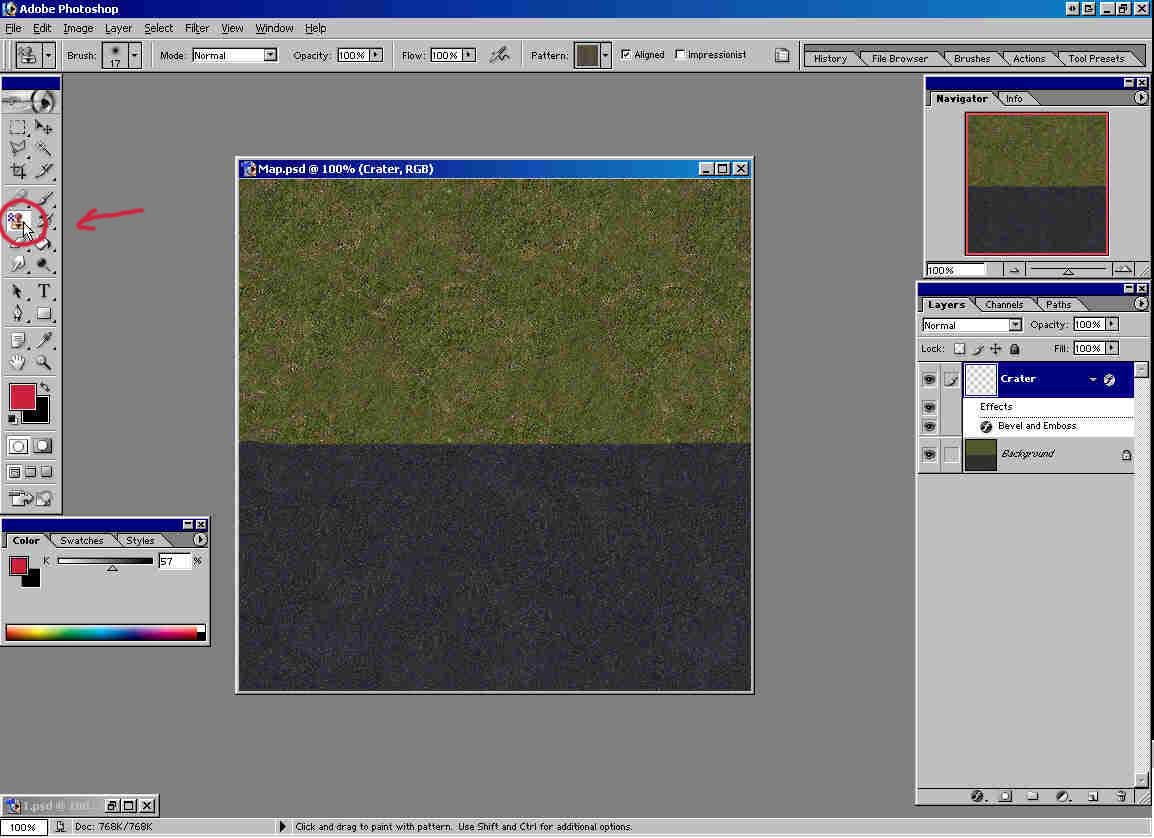
11)
Set brush size 65 pix.
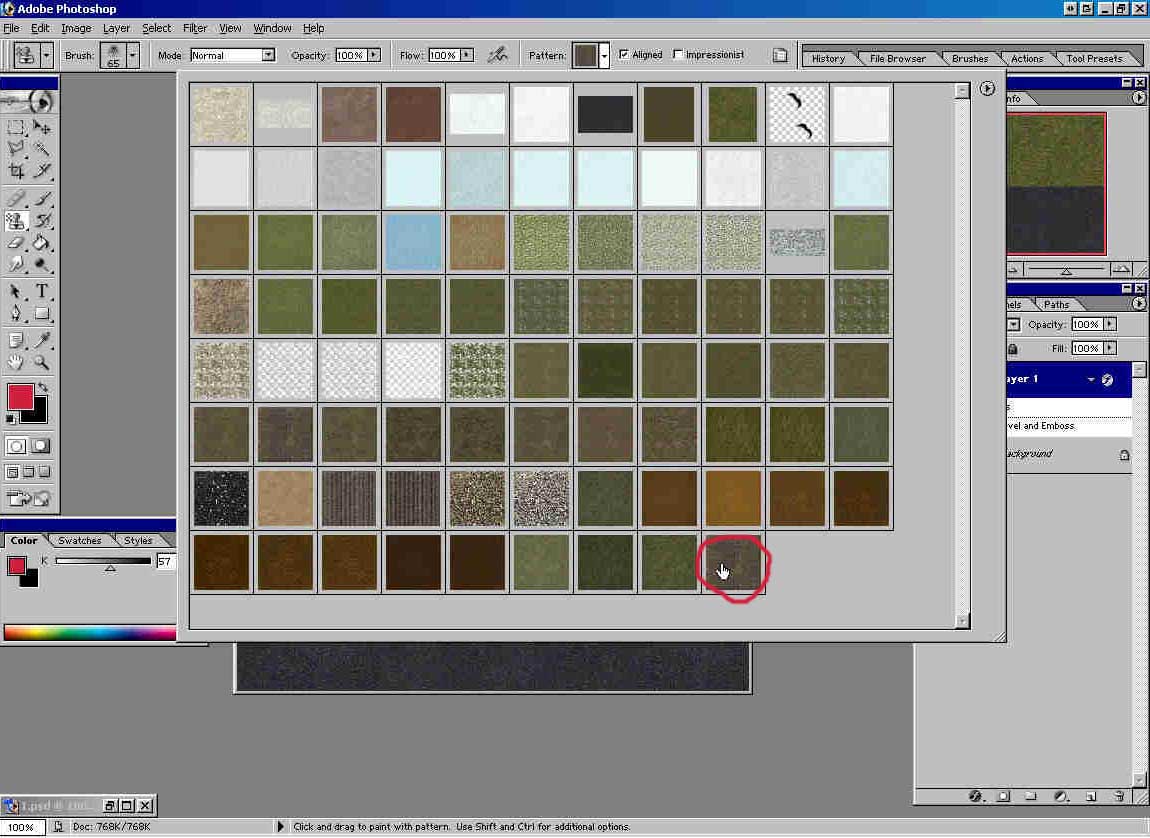
12)
Select pattern Ground (It's on the end of the list).

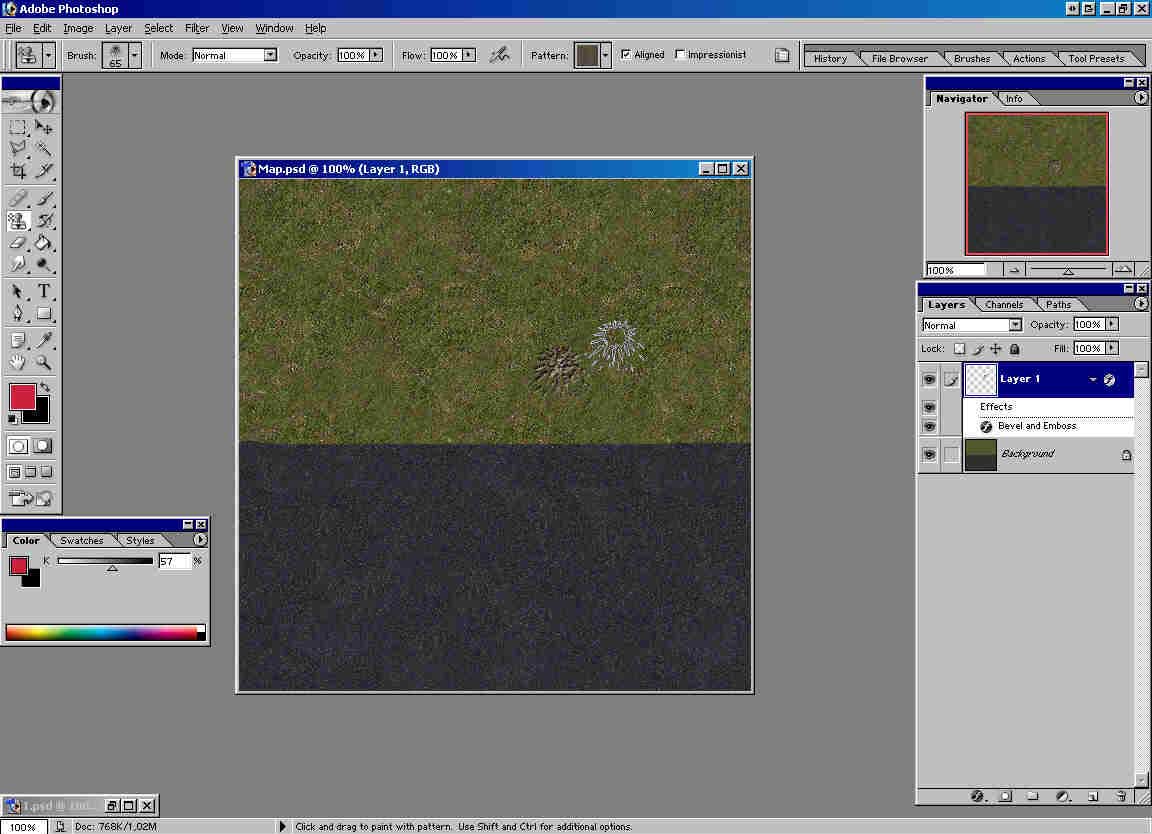
13)
Choose place where you want the crater and without moving
the mouse click about 6 times. It should look like this:
14)
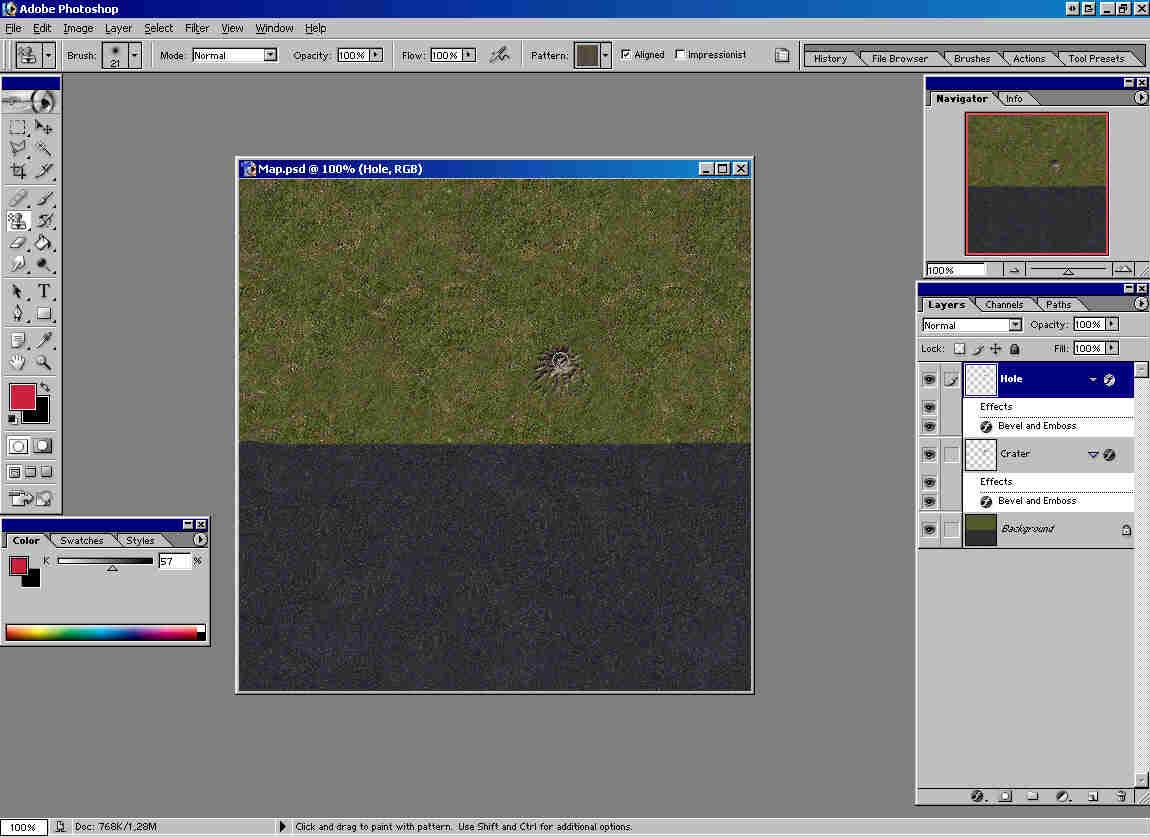
Create new layer and name it Hole.
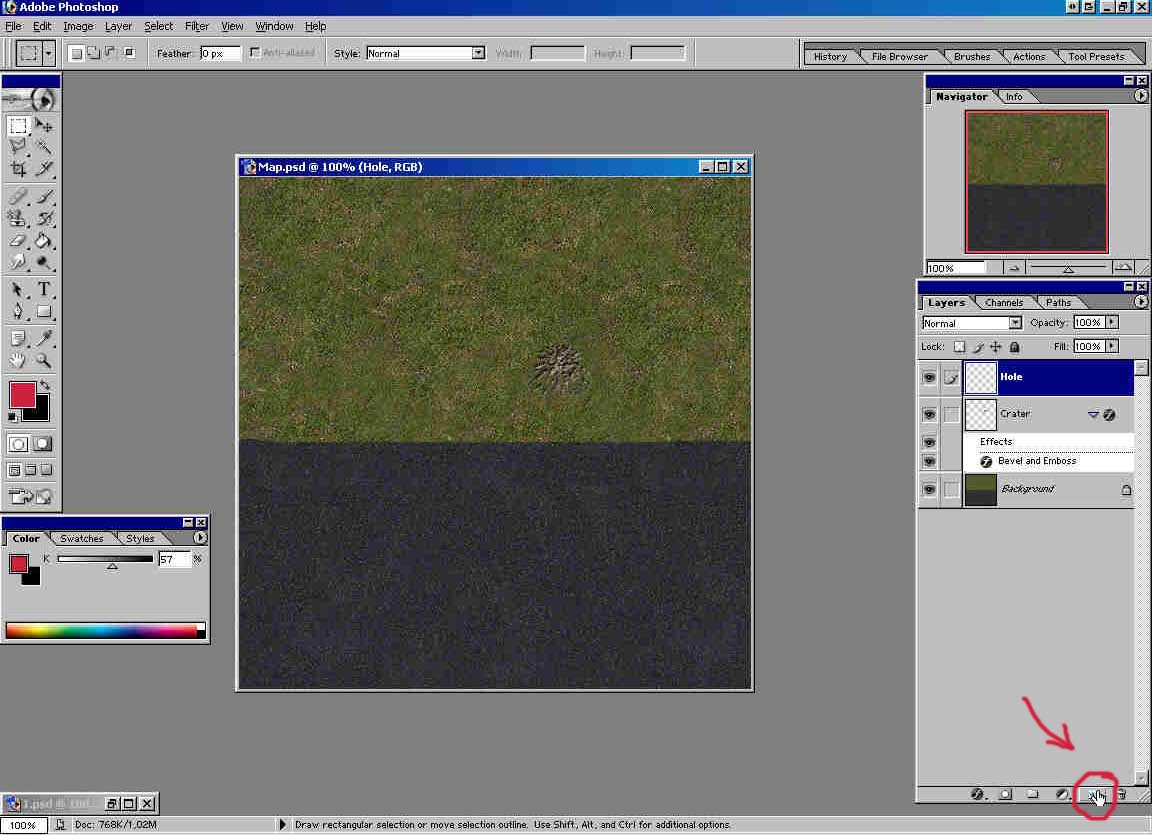
15)
Restore 1.psd.
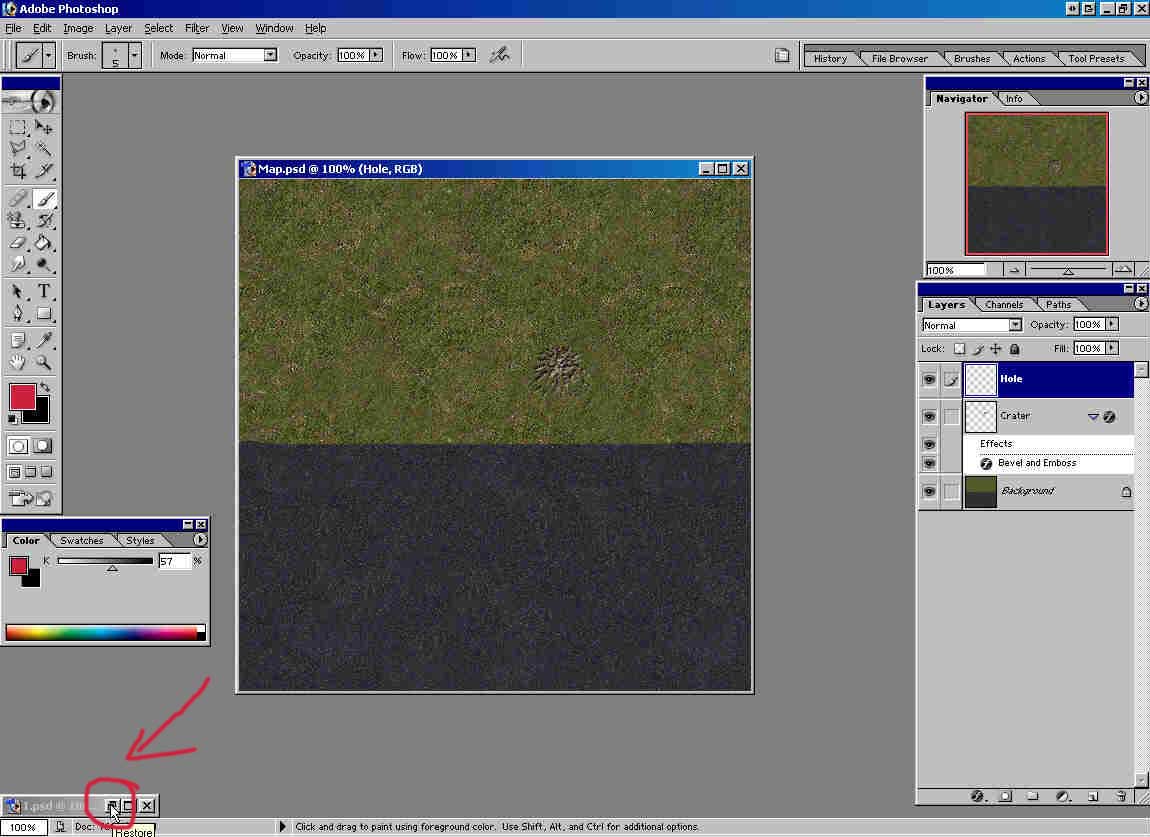
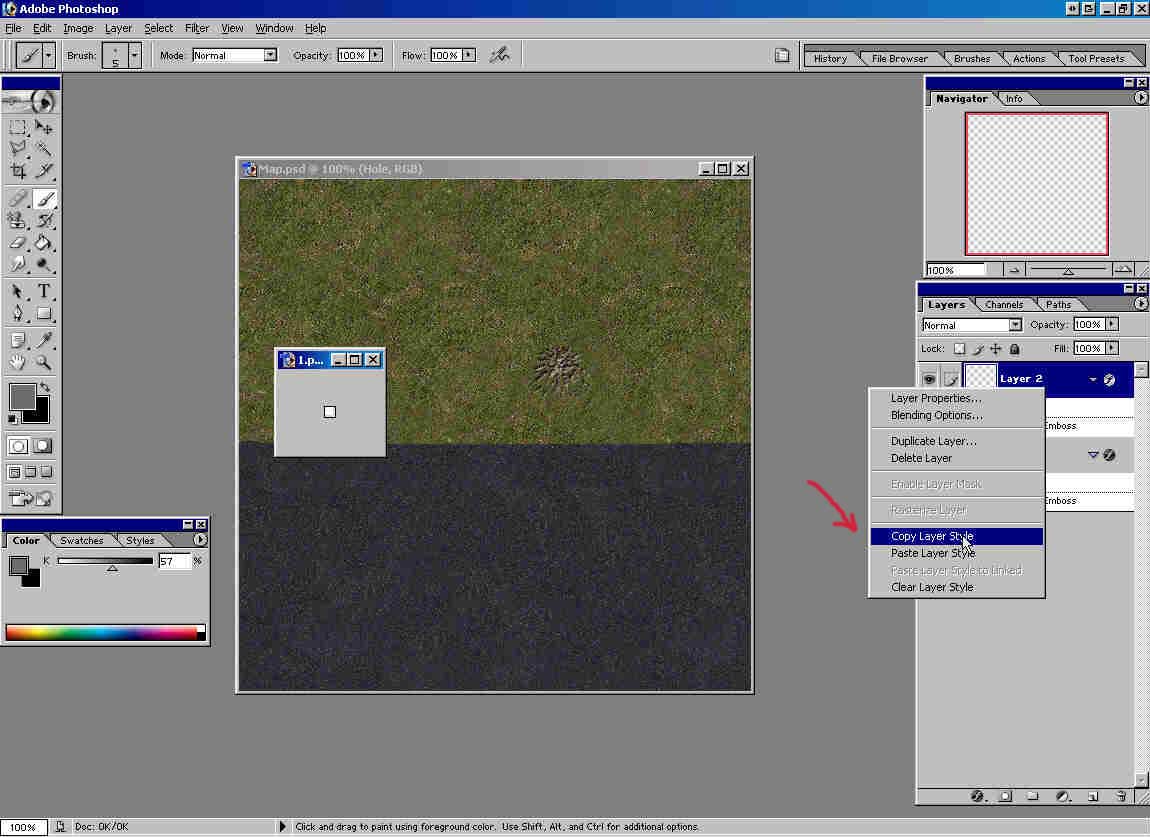
16)
Right click on Layer 2 -> Copy Layer Style. Then close 1.psd.
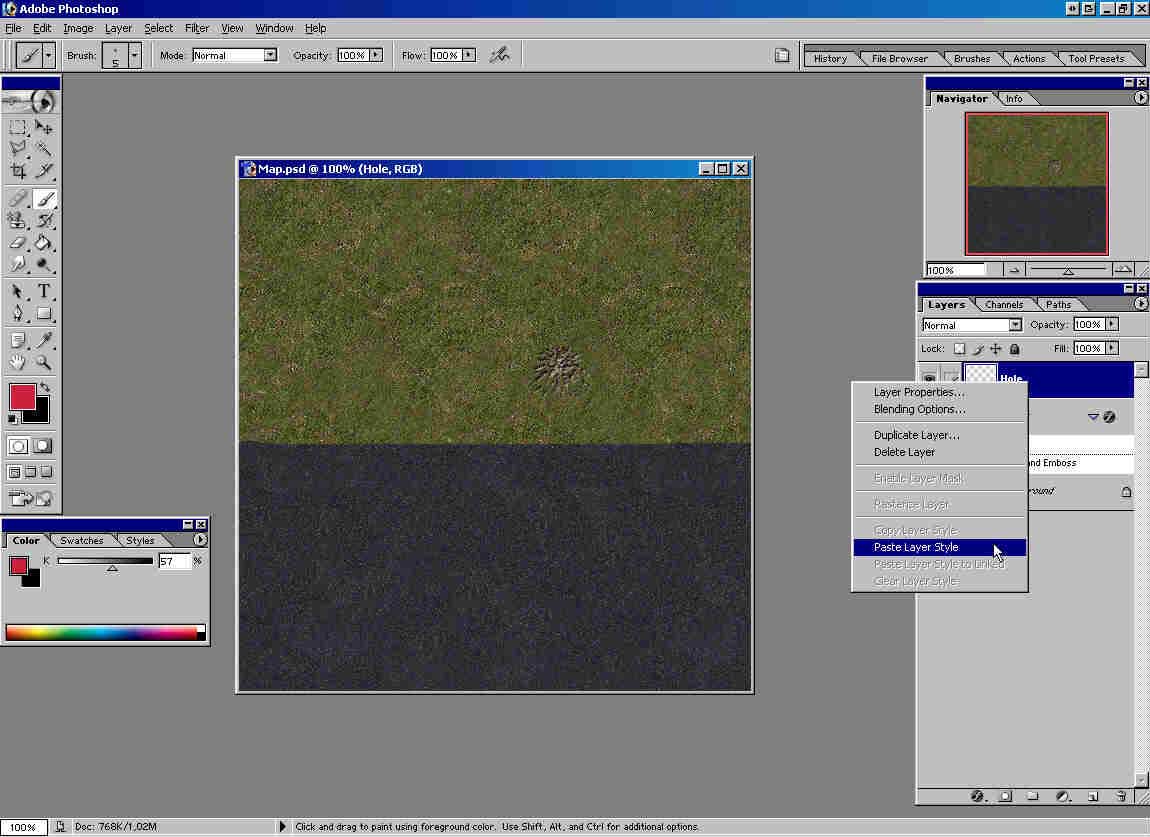
17)
Right click on layer Hole -> Paste Layer Style.
18)
Select Soft Round 21 pix brush for Pattern Stamp Tool.

19)
Place that brush where crater hole should be and click two or three
times. (Until you are satisfied with appearance.)
That's
it.
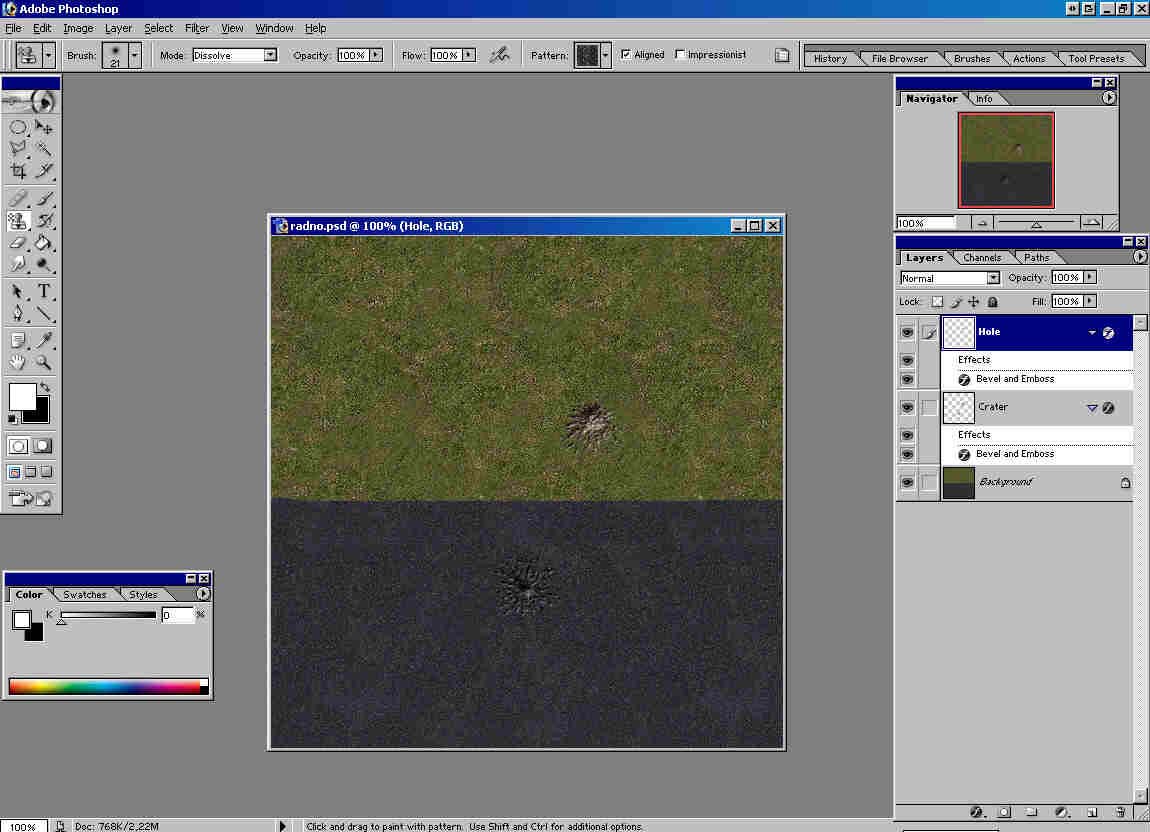
If you paint craters on asphalt use Dissolve mode for Pattern Stamp
Tool and asphalt pattern.
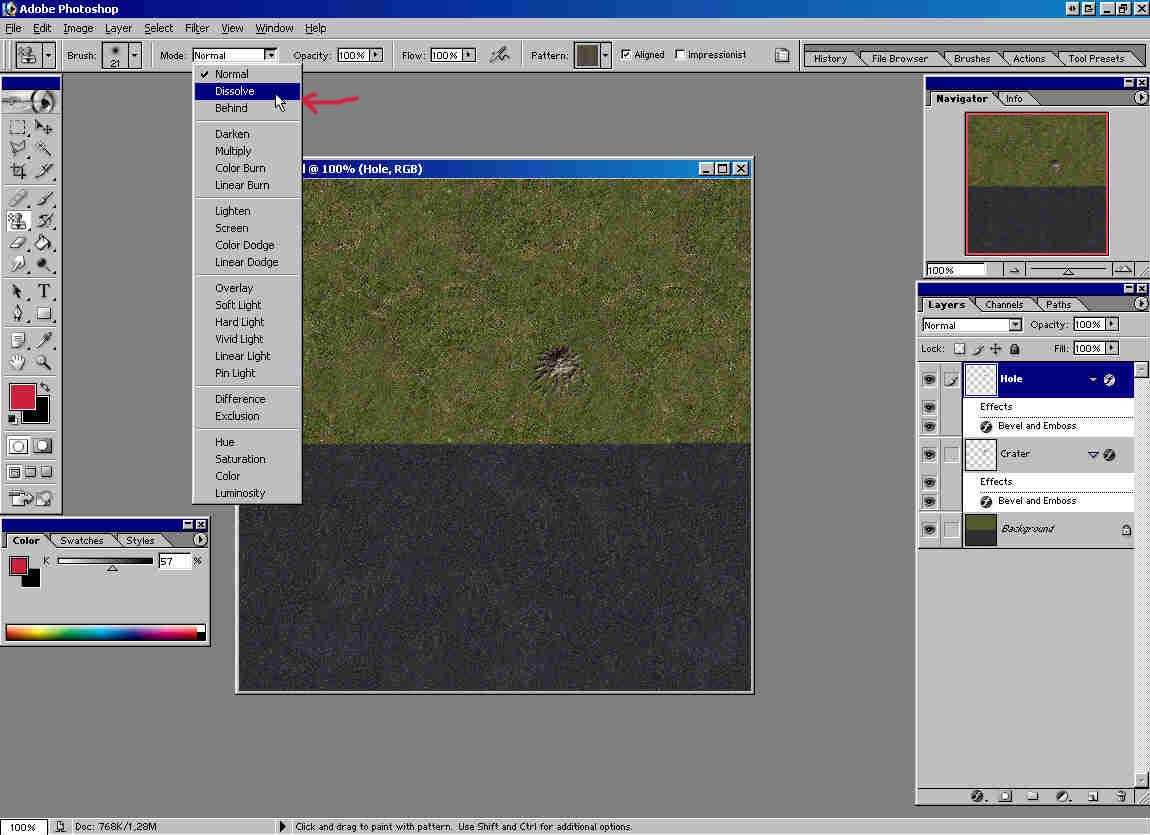
This
is crater on asphalt using Brush Mortar 2 and Dissolve mode for
Pattern Stamp Tool.
You
can also paint your own brush instead using Brush Mortar 1 or Brush
Mortar 2 picture.
Thanks
to Neil, http://www.close-combat-now.com/
for hosting this tutorial.
dodam,
heinrici45@yahoo.com
Top