Stream
Tutorial
Photoshop
7.0
Required
textures: dodamrock1 from Cliff tutorial.
Required
skills: Open, save image, create and rename layers, change layer
order, change layer opacity, select and resize brushes
Steps:
1)
Open map image (I'll use this small 512x512 image)
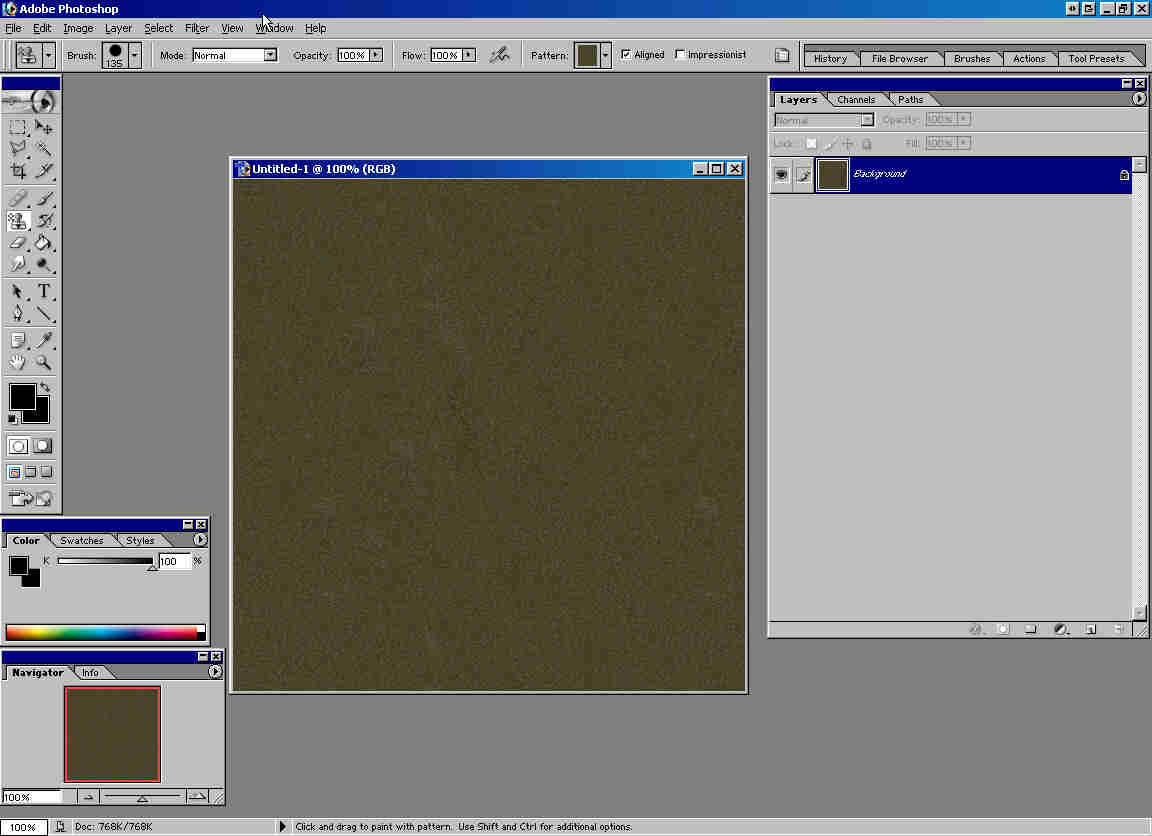
2)
Open Houxwater texture, define pattern (Edit -> Define Pattern)
and paint entire background with pattern Stamp Tool.
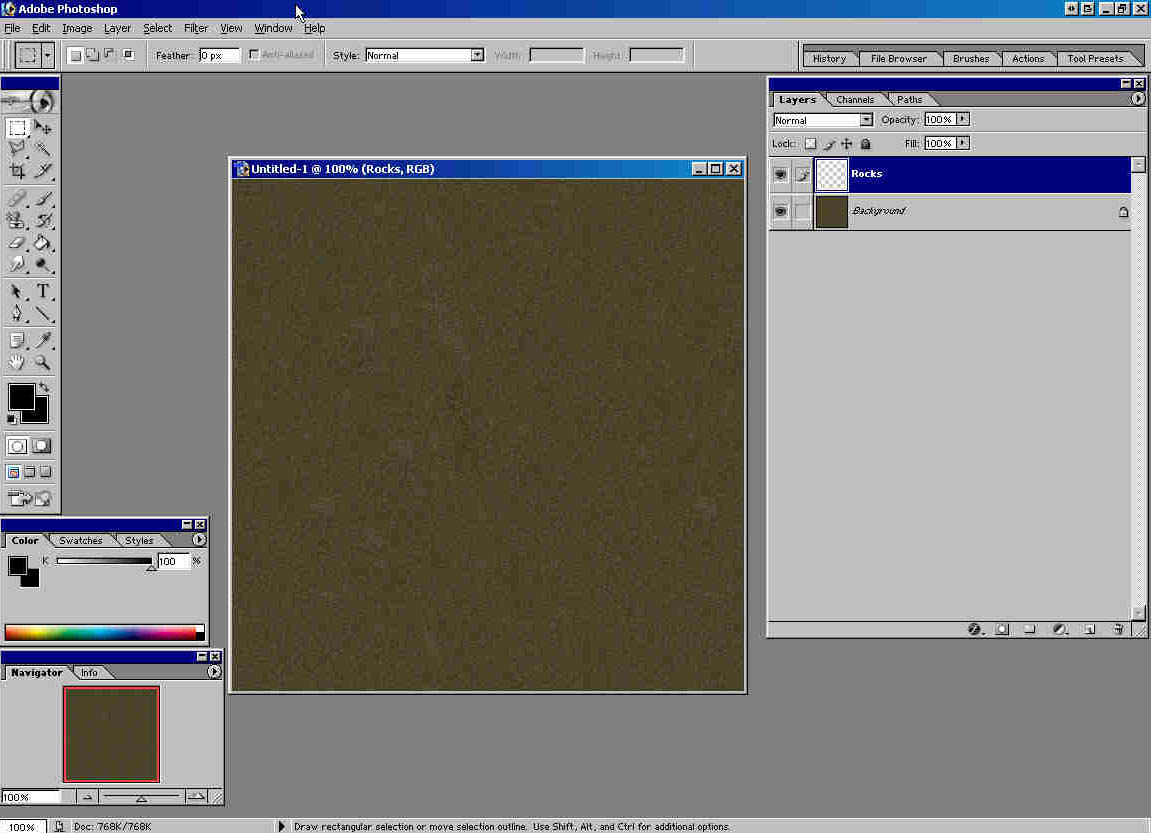
3)
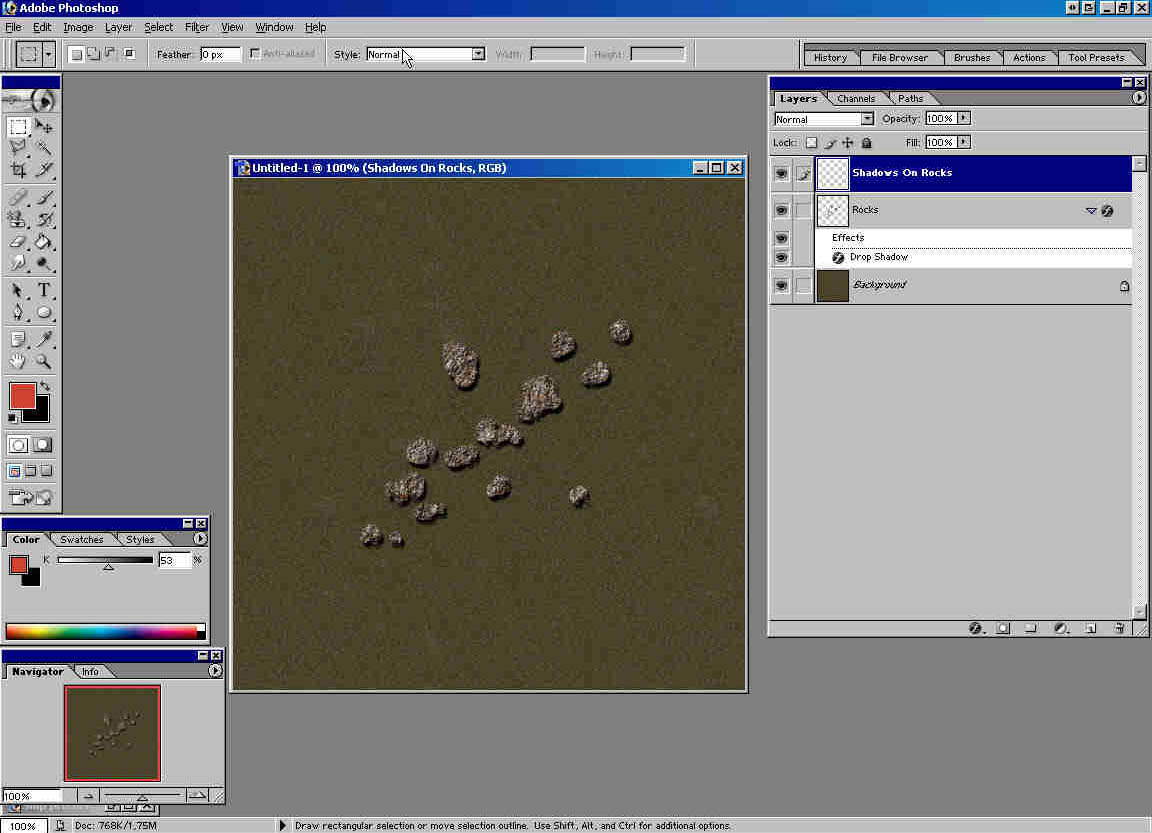
Create new layer and name it Rocks.
4)
Open image dodamrock1 and define pattern (Edit -> Define Pattern).
Select Pattern Stamp Tool, 13 pix hard round brush.
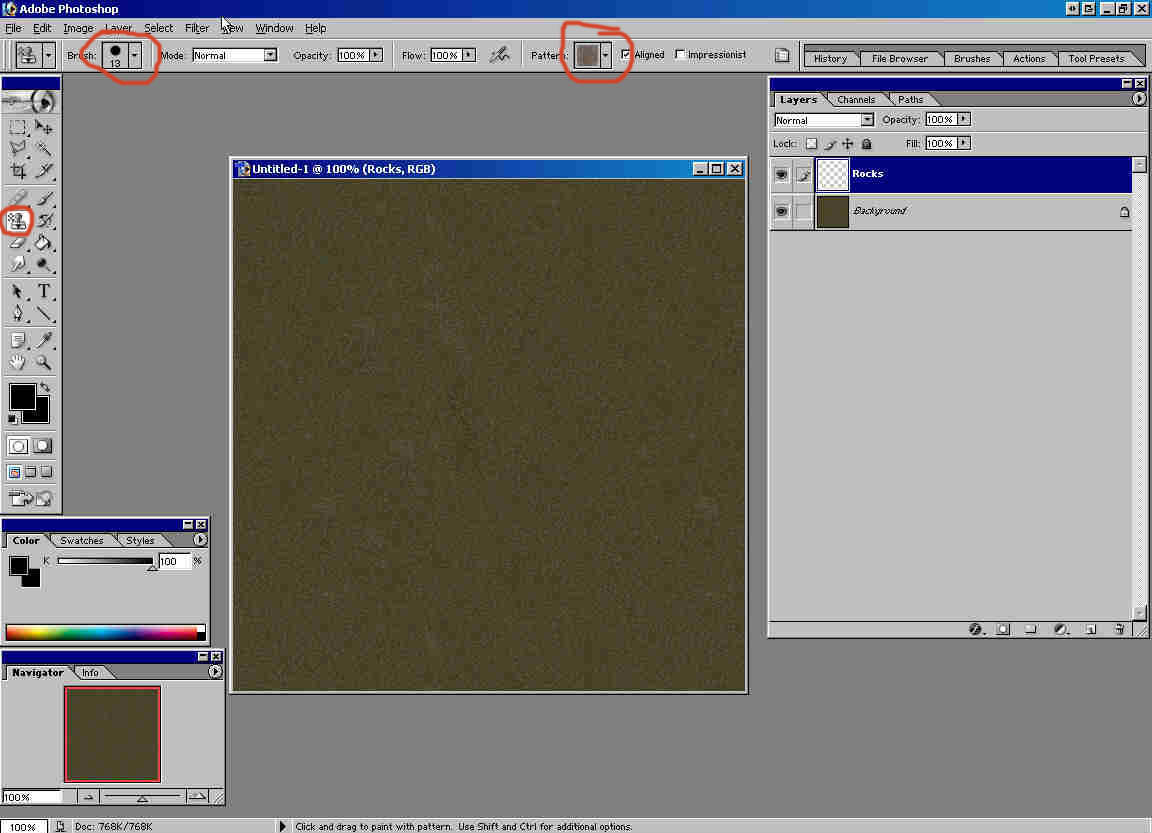
5)
Paint few rocks.
.
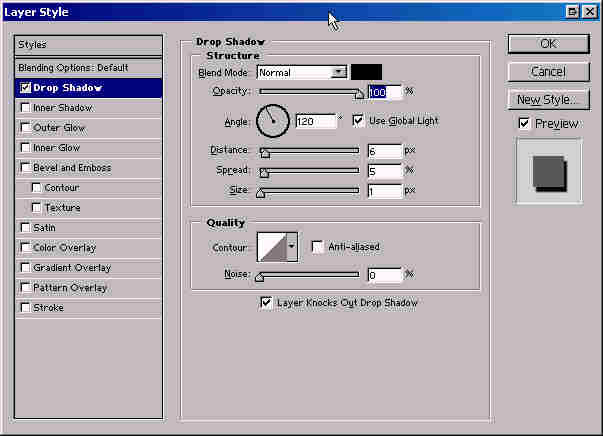
6)
Go Layer -> Layer Properties -> Drop Shadow and set it like
in the picture:
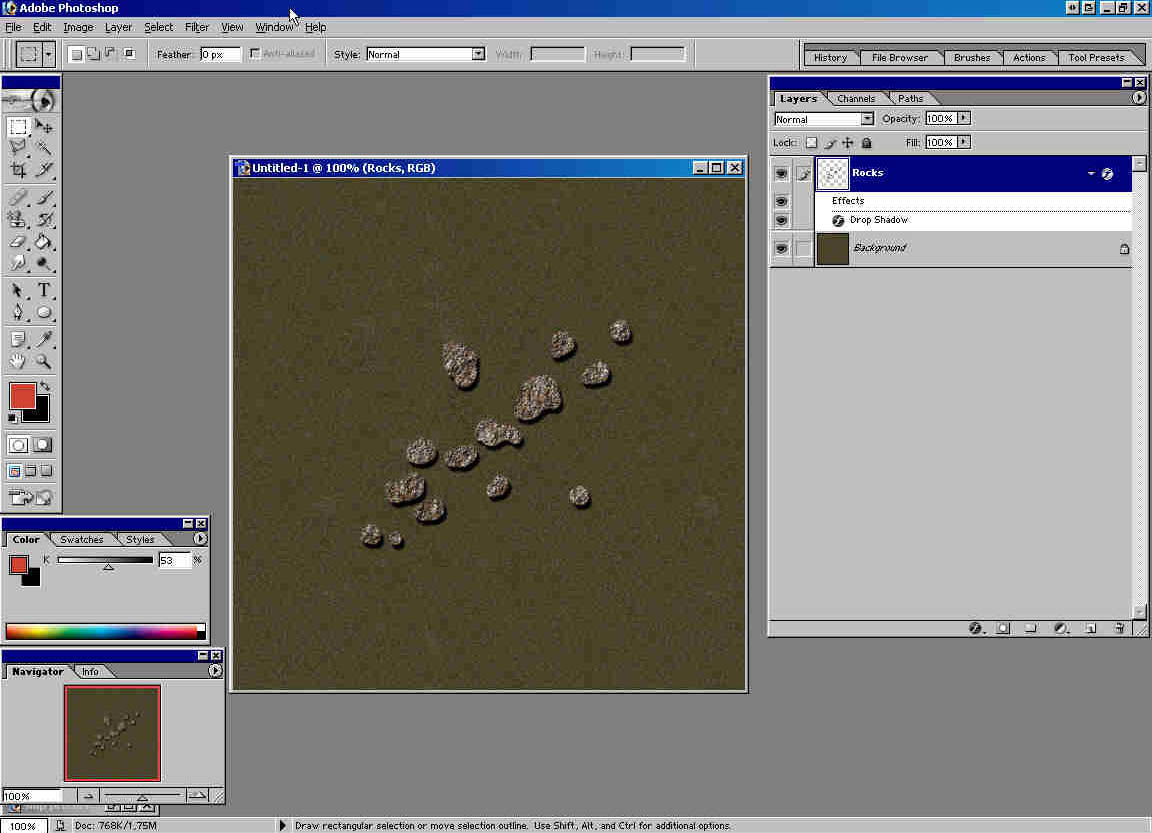
7)
Now, it should look like this:
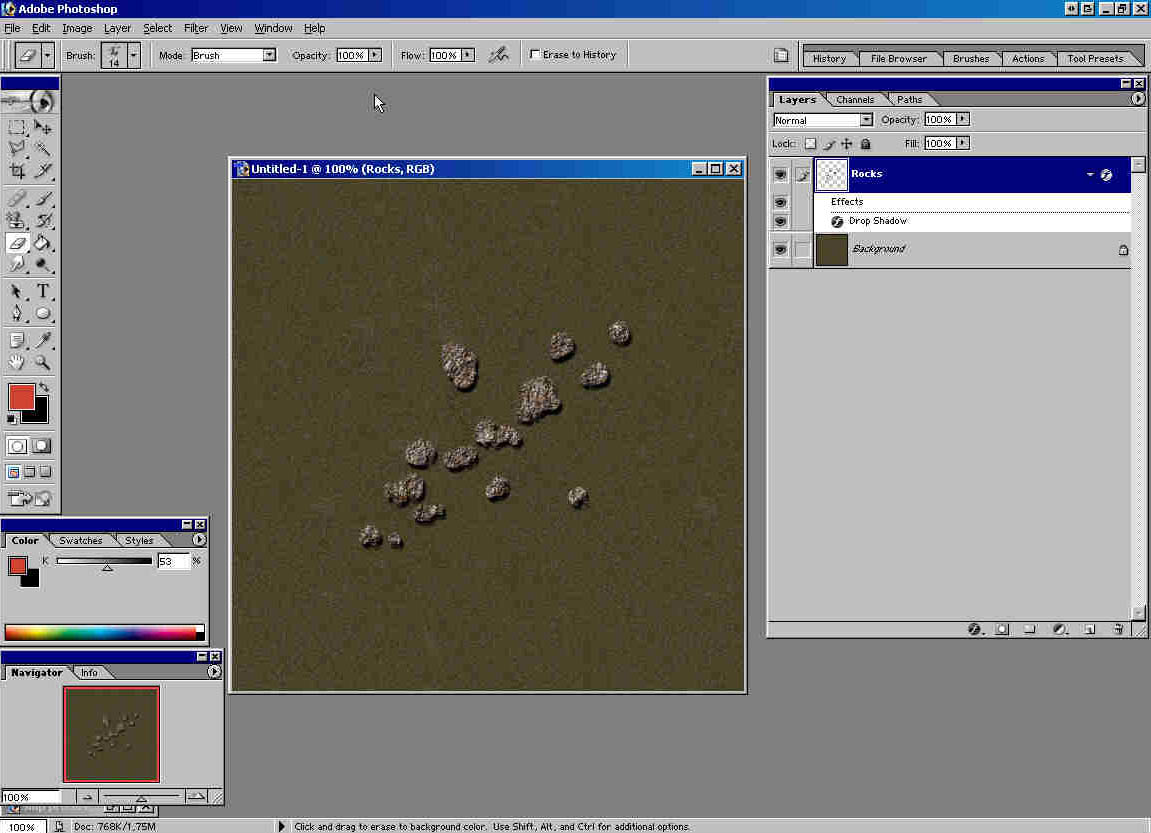
8)
Rocks look too flat and too clean. First use Eraser tool, spatter
brush 14 pix and erase parts of rocks edges with it:
9)
Now, create new layer and name it Shadows On Rocks:
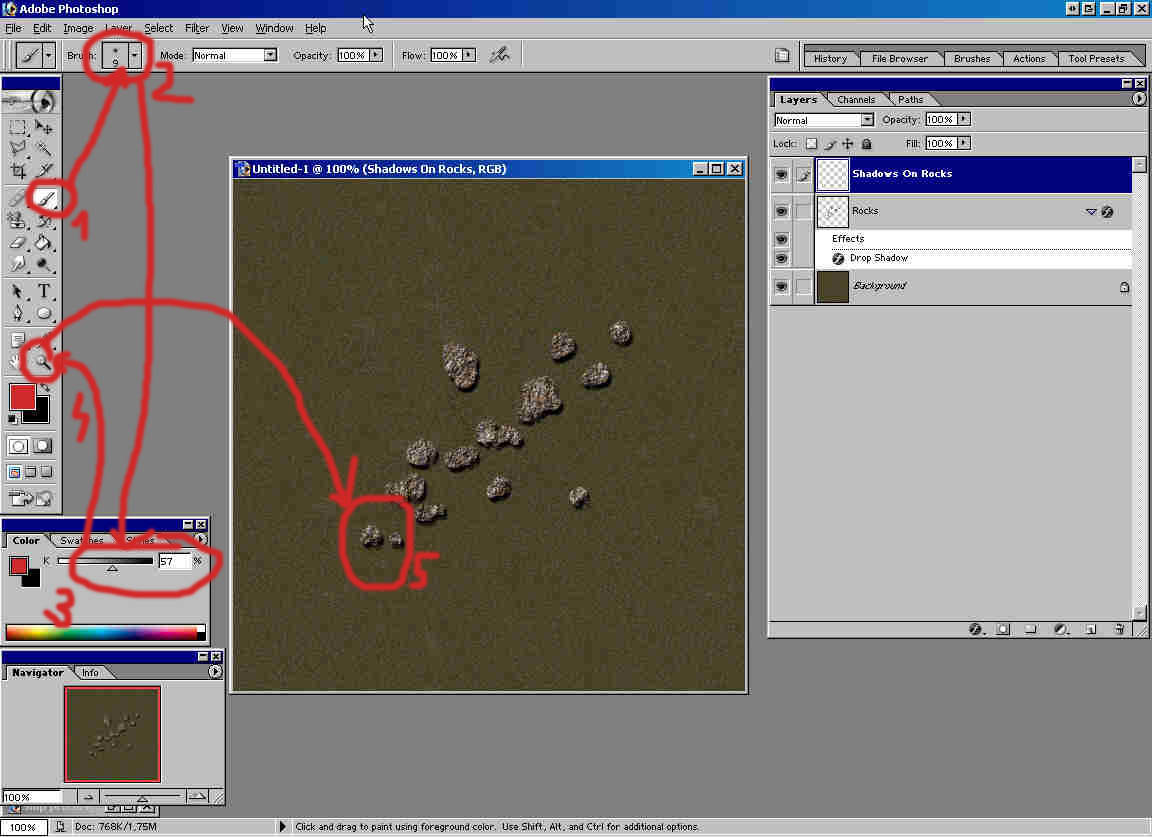
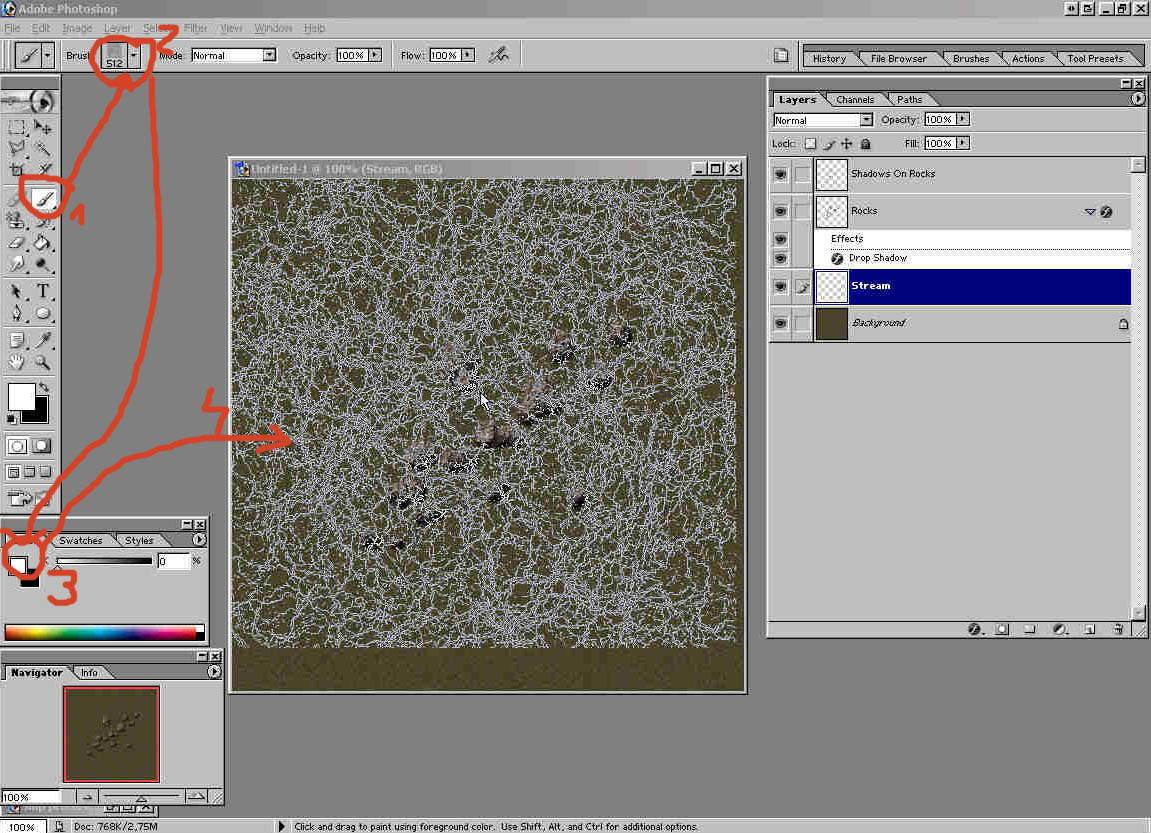
10)
Choose Brush Tool (1), 13 pix soft round brush (2), select black
color (3), and zoom in one of the rocks (4 & 5):
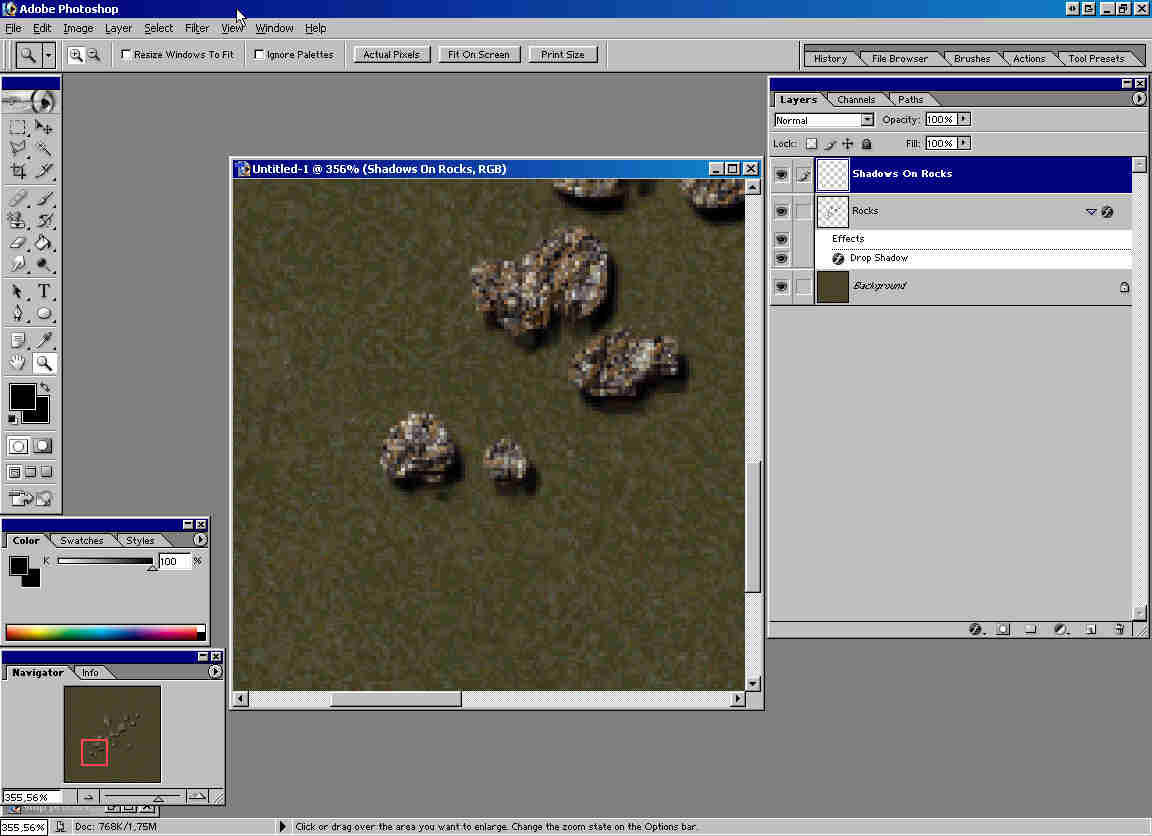
11)
It should look like this:
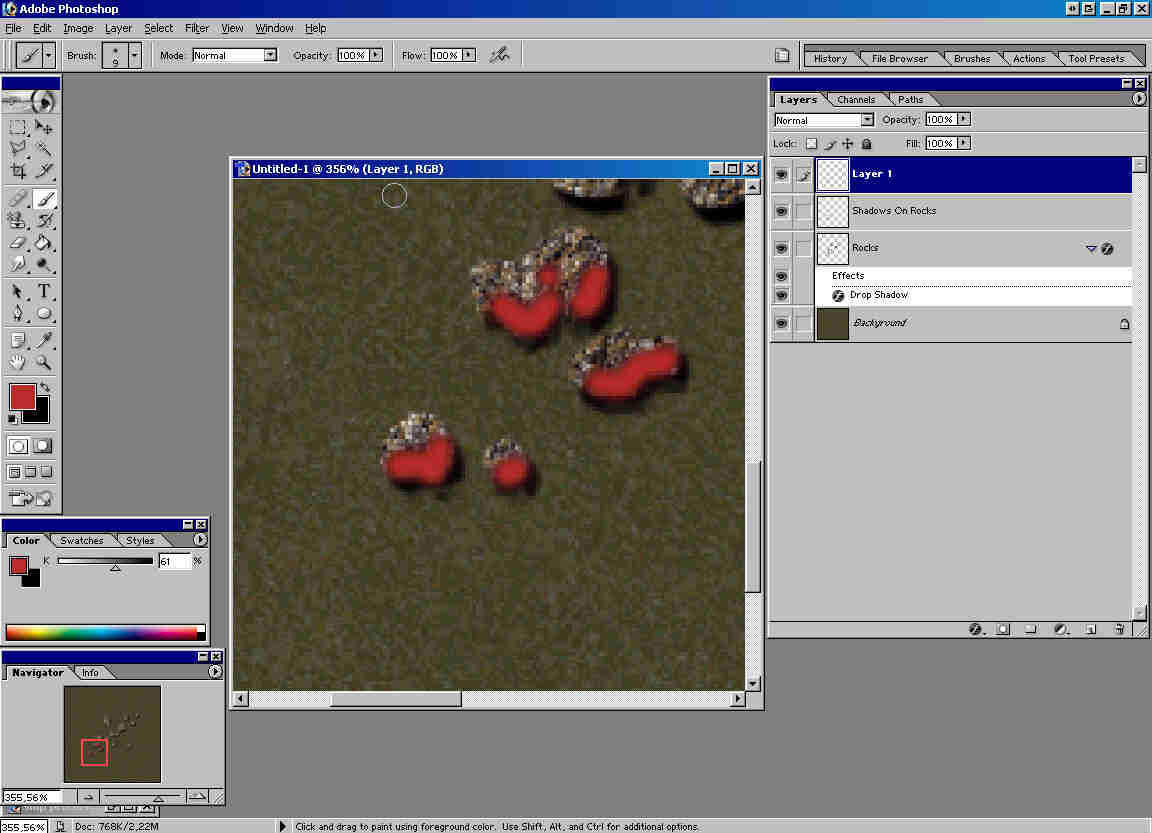
12)
Paint on south - east side of each rock. I'll use red paint to emphasize
where to paint (You use black.)
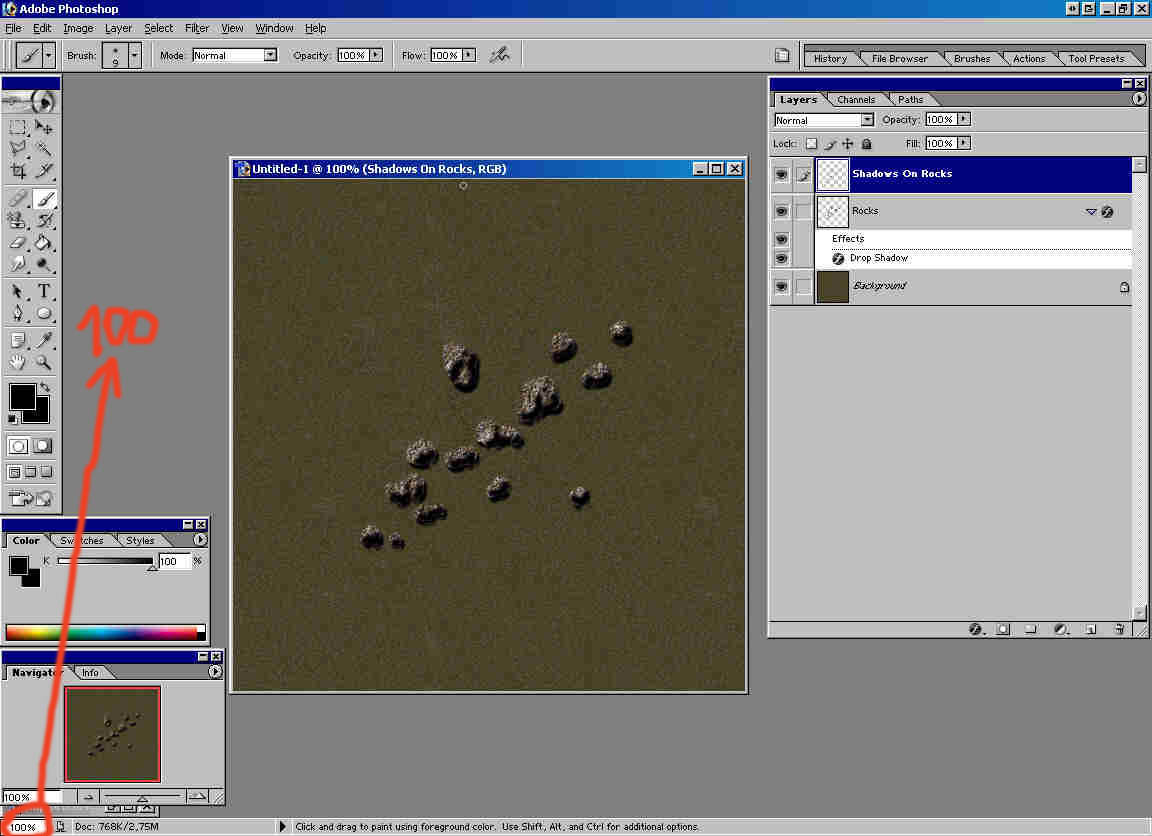
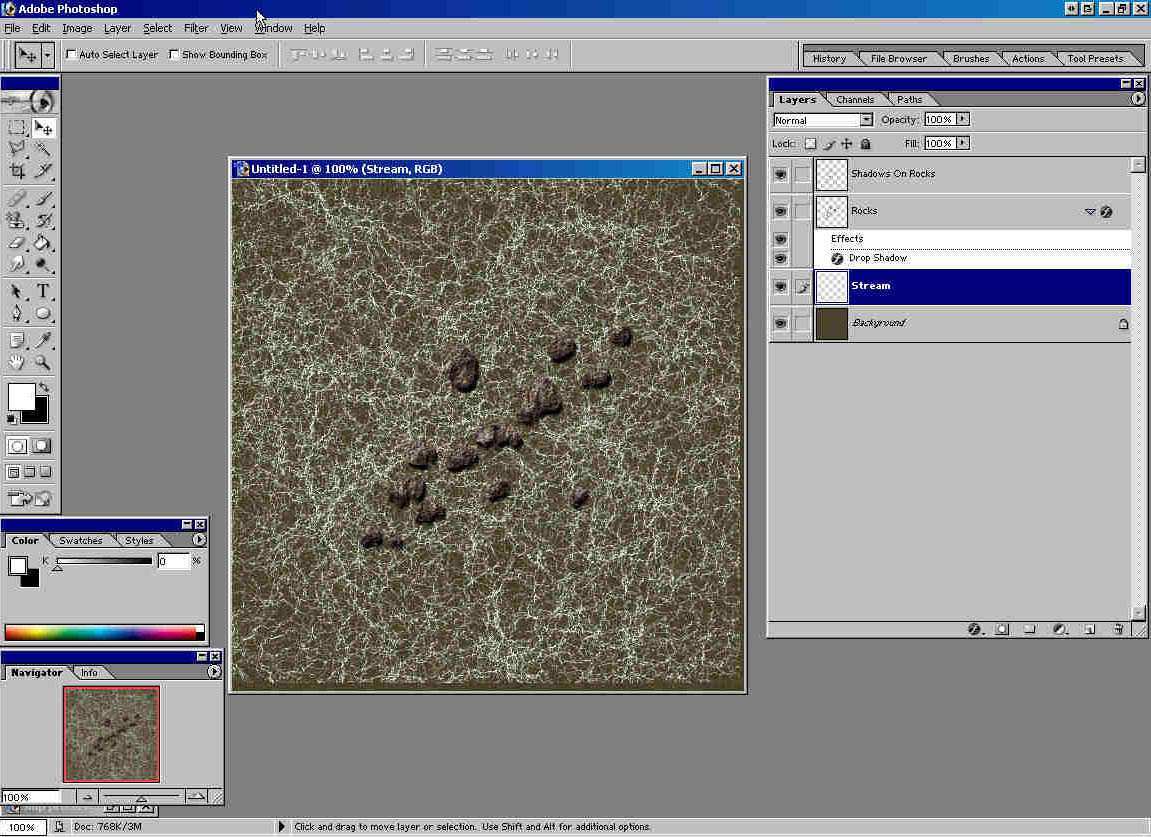
13)
After you've done with painting all rocks zoom to 100% (See picture
- type in there 100.) it should look like this:
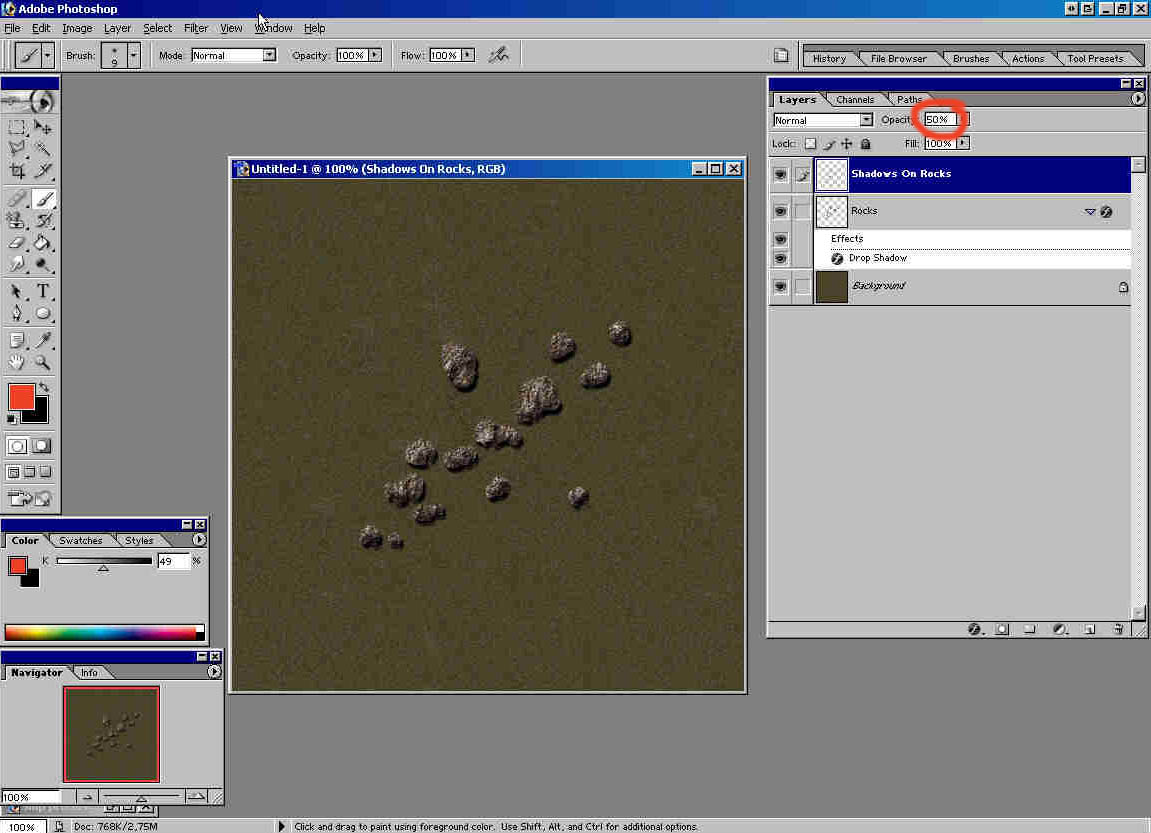
14)
Change Shadows On Rocks layer opacity to 50%. Now Rocks look like
rocks.
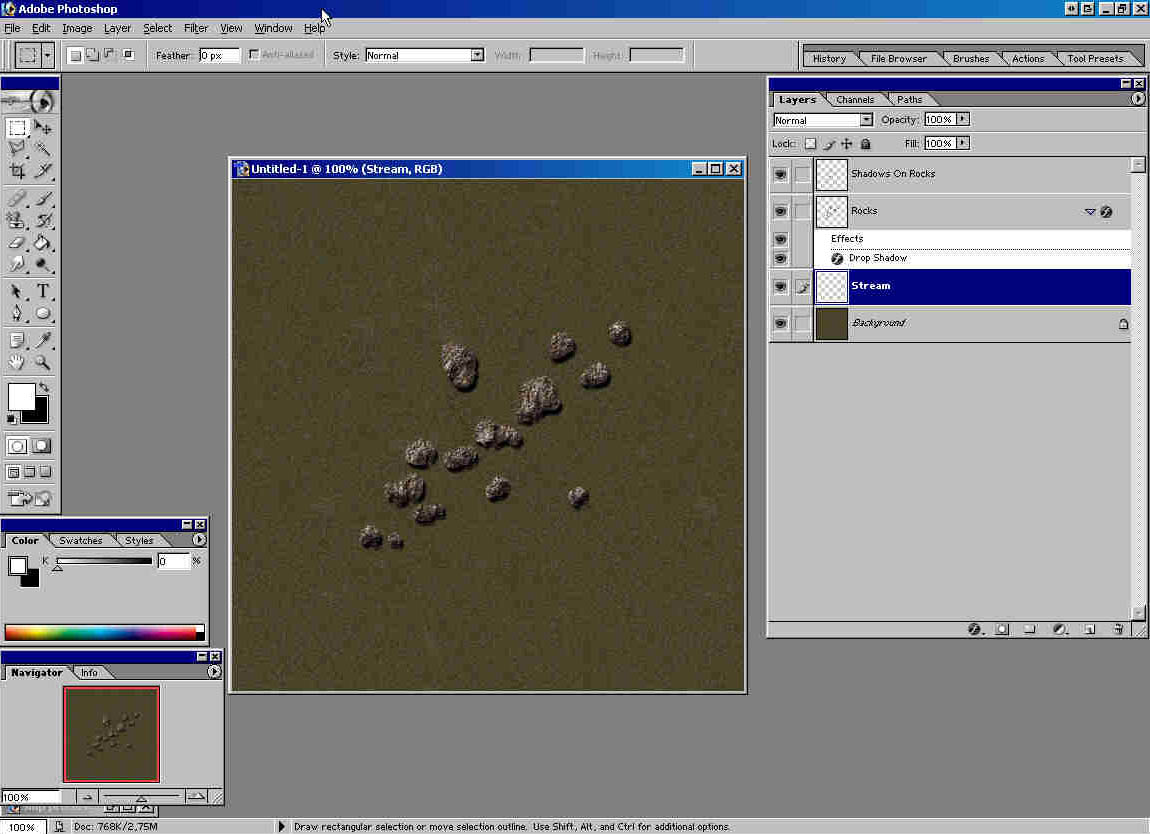
15)
Create new layer and name it Stream. Move it between Background
and Rocks layer:
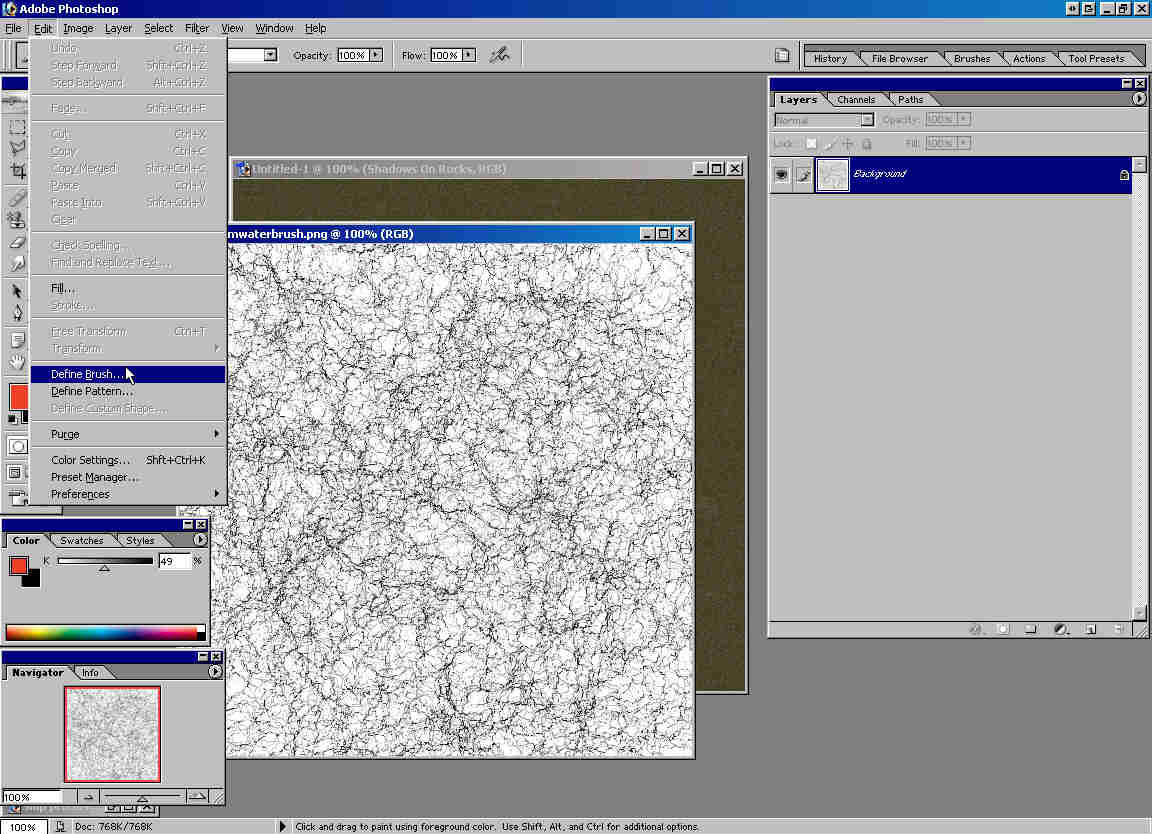
16)
Open dodamwaterbrush image. Go Edit -> Define Brush. Name new
brush dodamwaterbrush.
17)
Select Paint tool (1), select dodamwaterbrush (2)(leave it at 512
pix), and white color(3).
18)
Click once or twice (Make sure that all the rocks are covered with
brush and do not click twice on the same spot.)
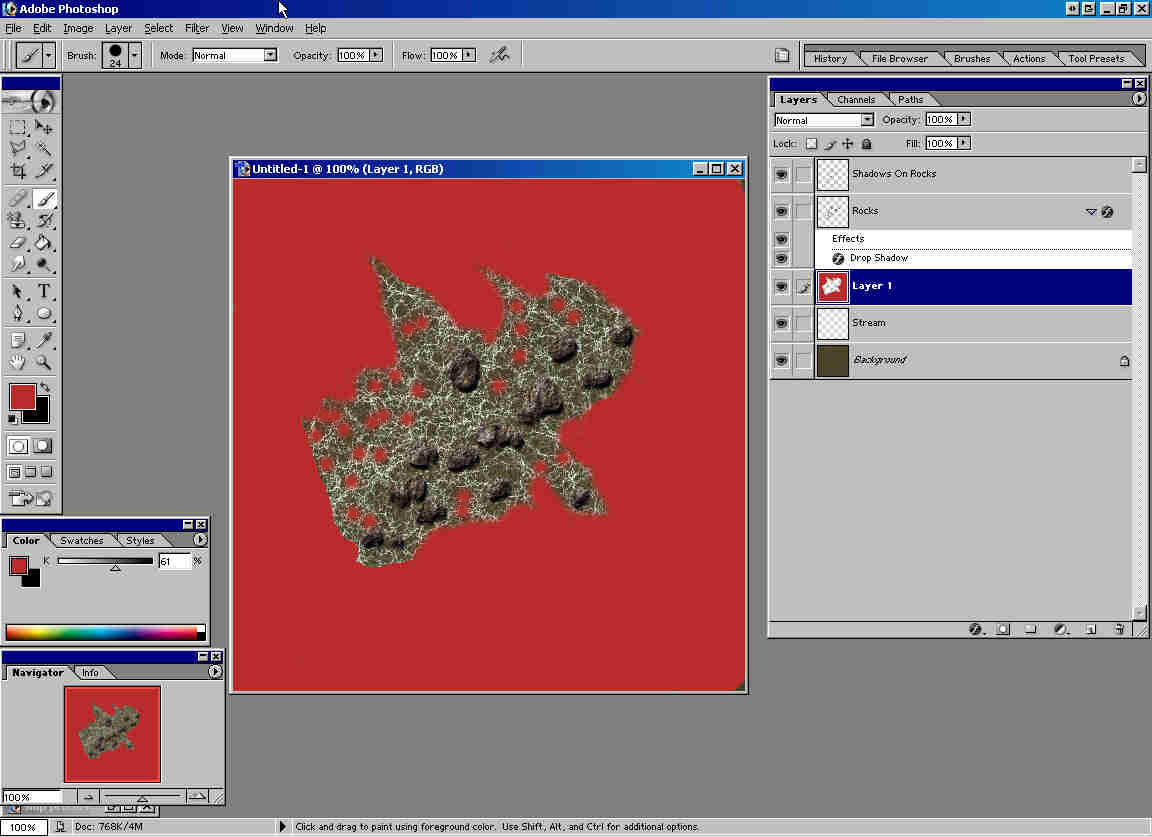
19)
Select Eraser tool, 21 pix soft round brush. And erase parts of
Stream layer. I'll use red paint to indicate where to erase: (You'll
have to a bit in this step to achieve best look.)
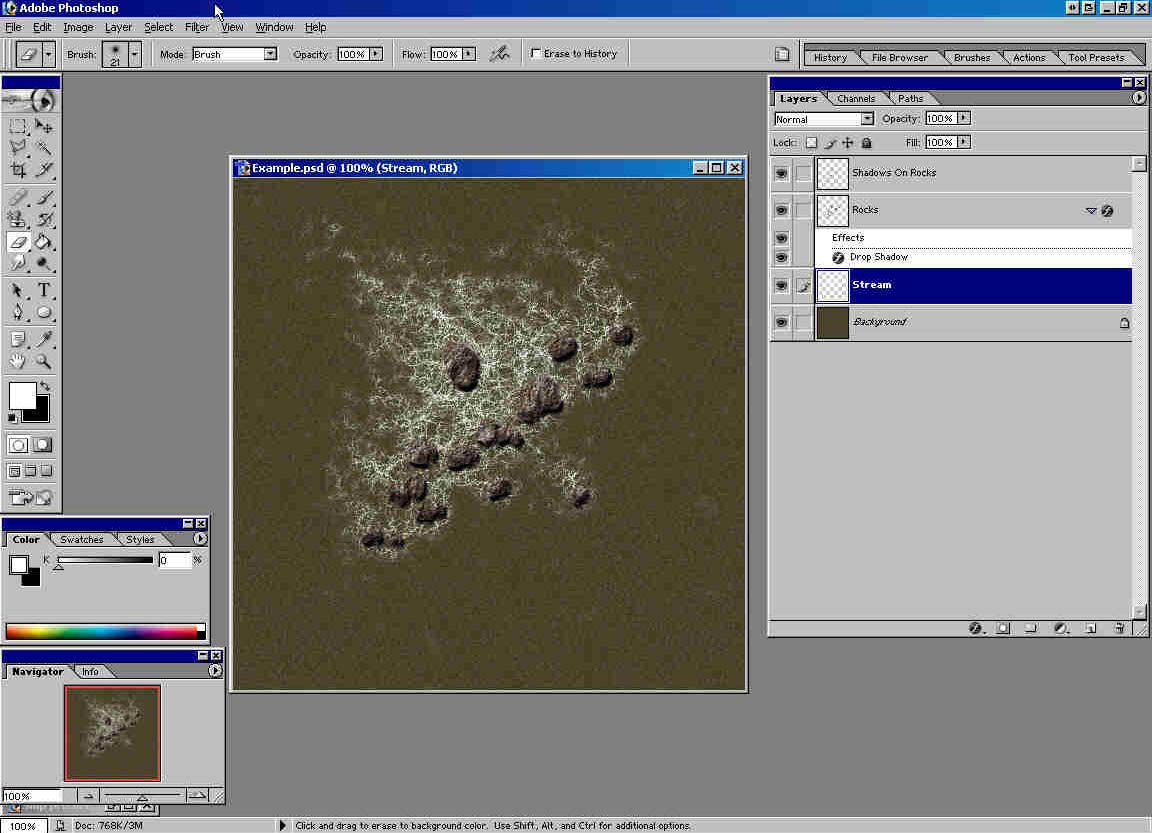
20)
It should look like this:
21)
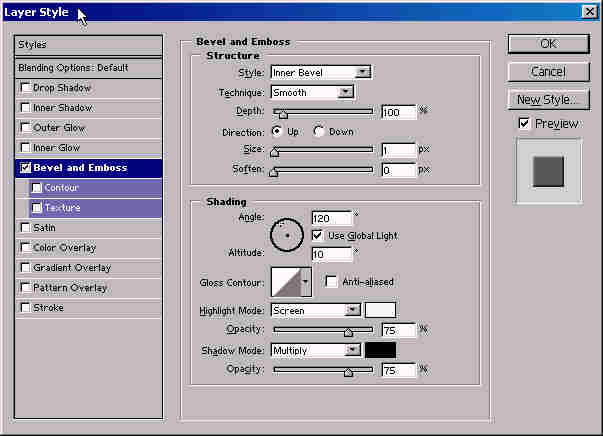
Go Layer -> Layer Style -> Bevel and Emboss and set parameters
like in the picture:
22)
Create new layer and name it White Down.
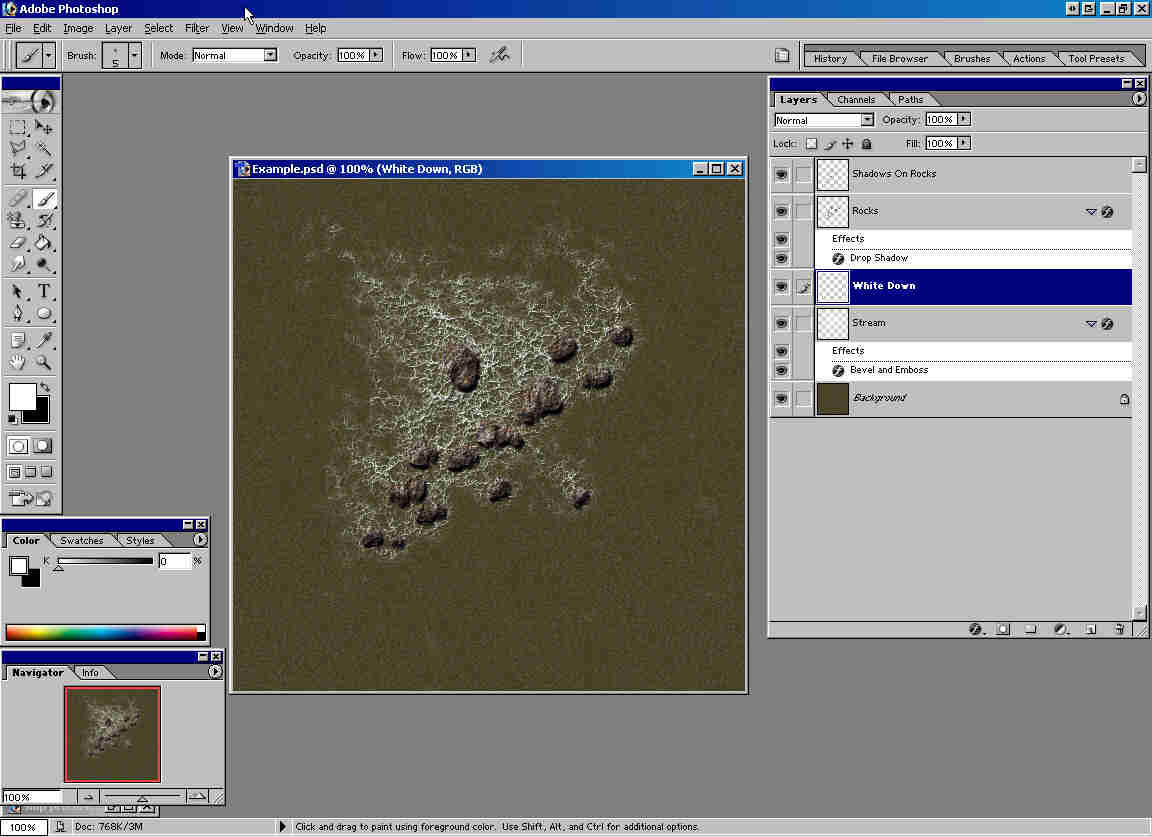
23)
Select Brush tool, 9 pix soft round brush and white color (use this
settings further on). Paint on the north - west and south - east
side of each stone. (Try not to overdo it.)
24)
Create new layer, name it White Up. And move it above Rocks layer.
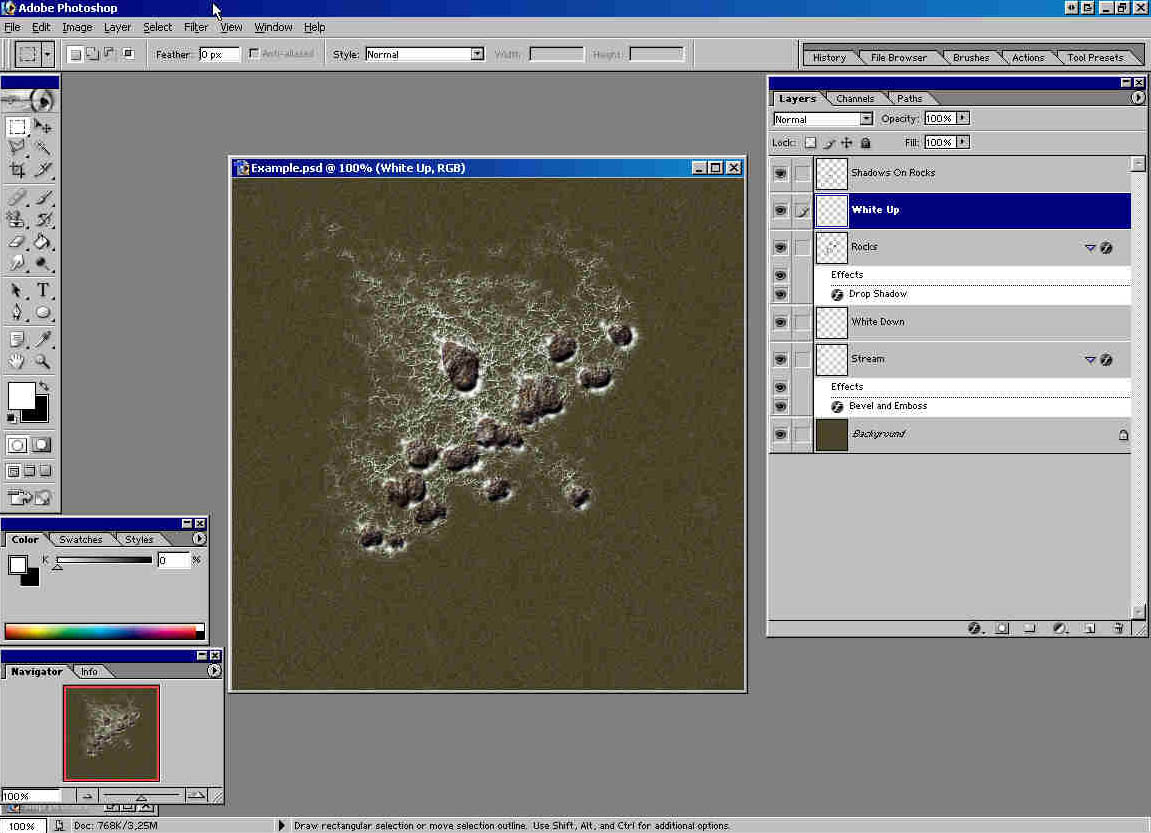
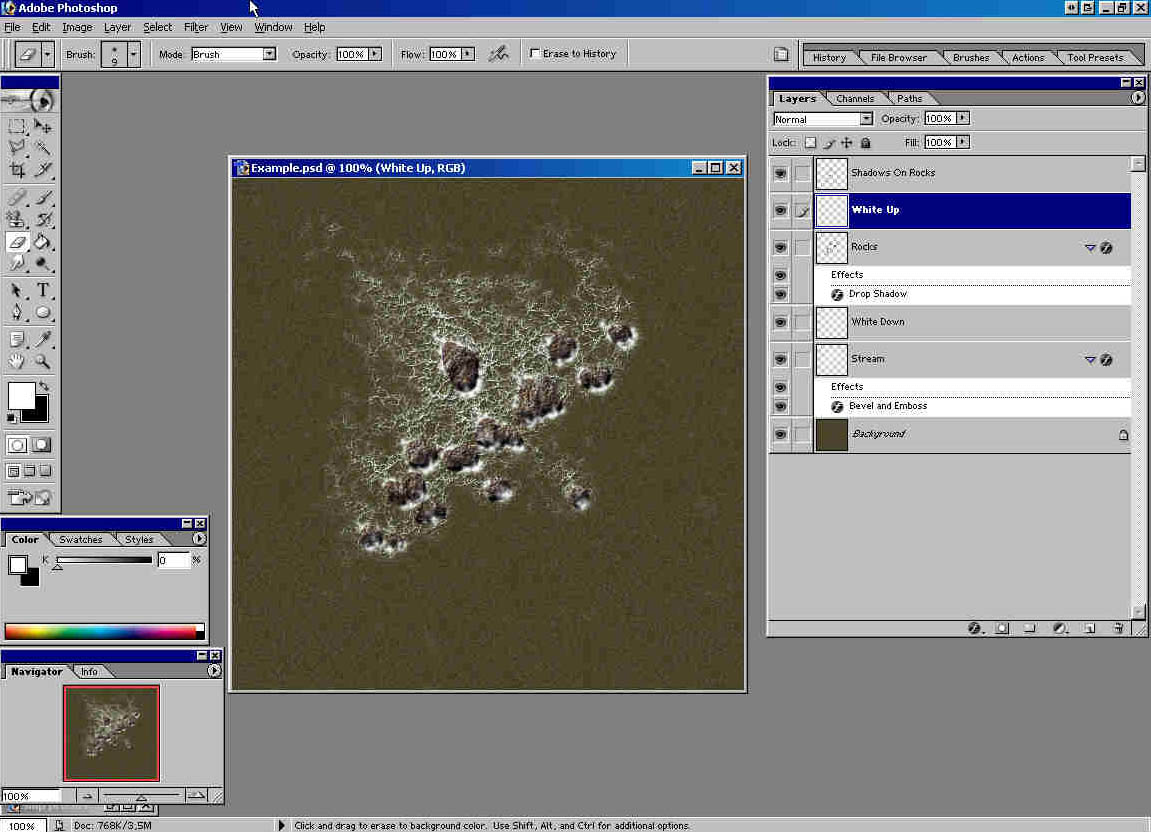
25)
Paint over south - east edge of every stone. This will make illusion
of water going over the stones. Use eraser to improve looks.
26)
Now create another layer, name it White (How imaginative!) and move
it to the top of all layers. Paint on it. (Just one or two clicks
on each stone.) Layer White Up is in shadow of stones, layer White
will give more white water. Use Eraser tool to improve looks.

27)
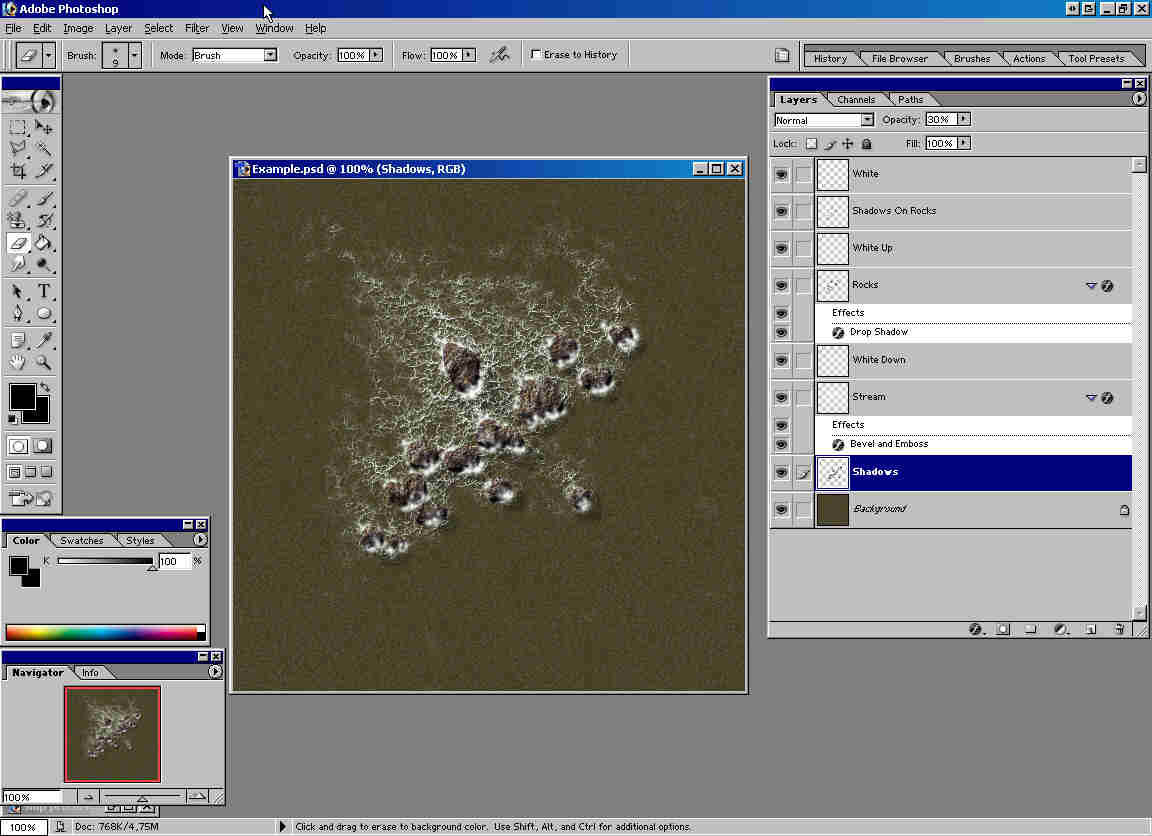
Create new layer, name it Shadows. Set it's opacity at 30% and paint
(with 13 pix soft round brush, black color) larger shadow for each
stone.
Thanks
to Neil, http://www.close-combat-now.com/
for hosting this tutorial.
dodam,
heinrici45@yahoo.com
Top